Setting up Project System
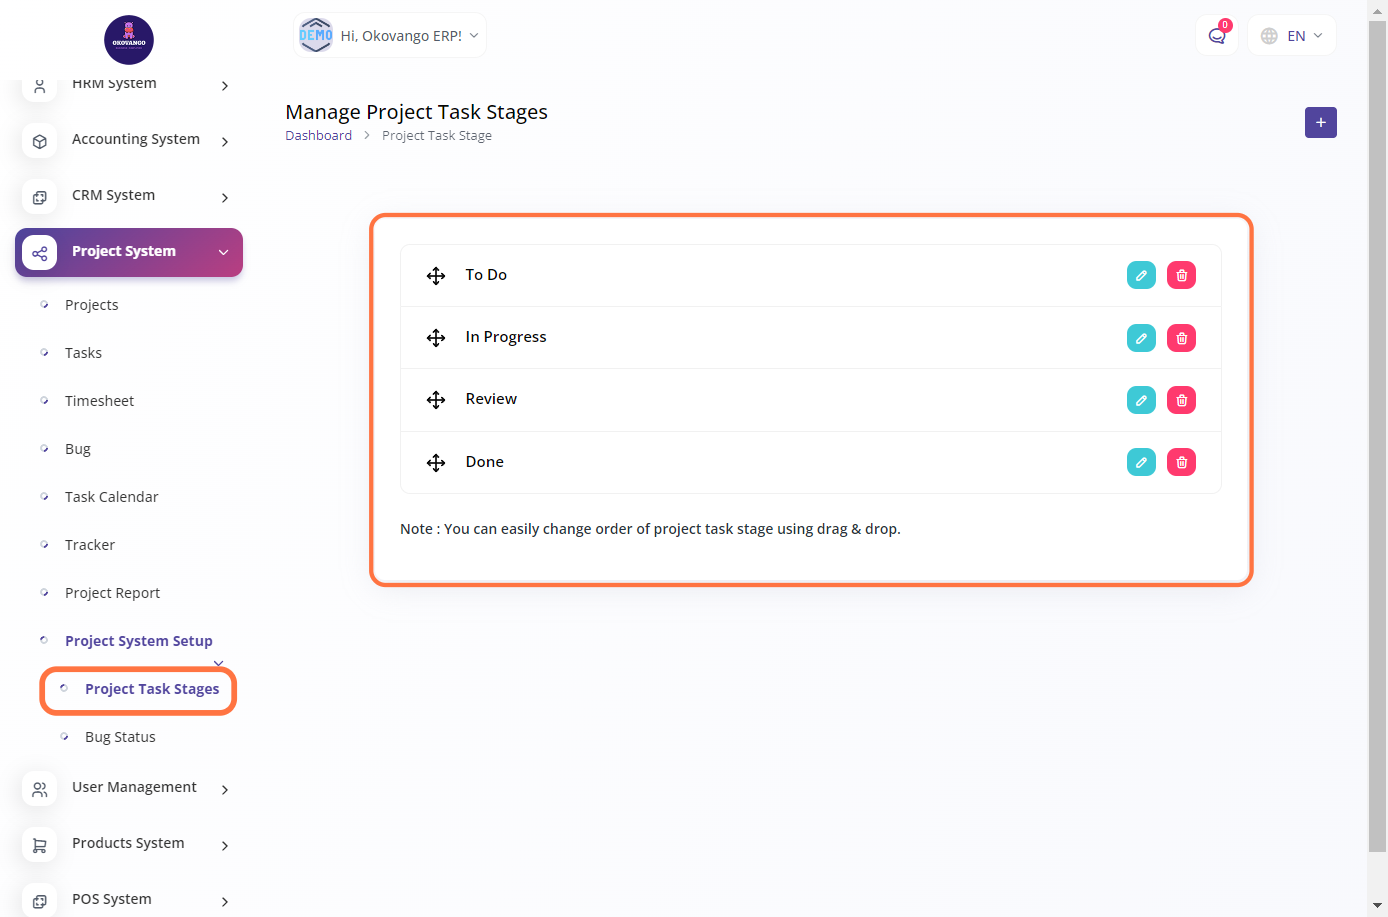
Project Task Stages
You can define the different stages or phases that a project task goes through during its lifecycle. These stages represent the progress and status of the task, allowing you to track and manage its completion. You can create custom task stages specific to your organization's project management processes and requirements. Each stage typically represents a distinct step or milestone in the task's progress, such as "To Do," "In Progress," "Review," and "Done." By setting up project task stages, you can effectively organize and monitor the tasks within your projects, ensuring smooth workflow and efficient project management.
Step 1: Click the "Create" Button

STEP 2: Create New Project Task Stage
To create a new project task stage, follow these steps:
1. Enter the name of the project task stage. This could be a descriptive name that represents the specific stage or phase of the task.
2. Select a color for the project task stage. This can be helpful for visual differentiation and quick identification of task stages.
3. Click on the "Create" button to finalize the creation of the new project task stage.
By creating project task stages, you can effectively categorize and track the progress of tasks within your projects, providing a clear overview of the task's current status and allowing for better project management and collaboration.

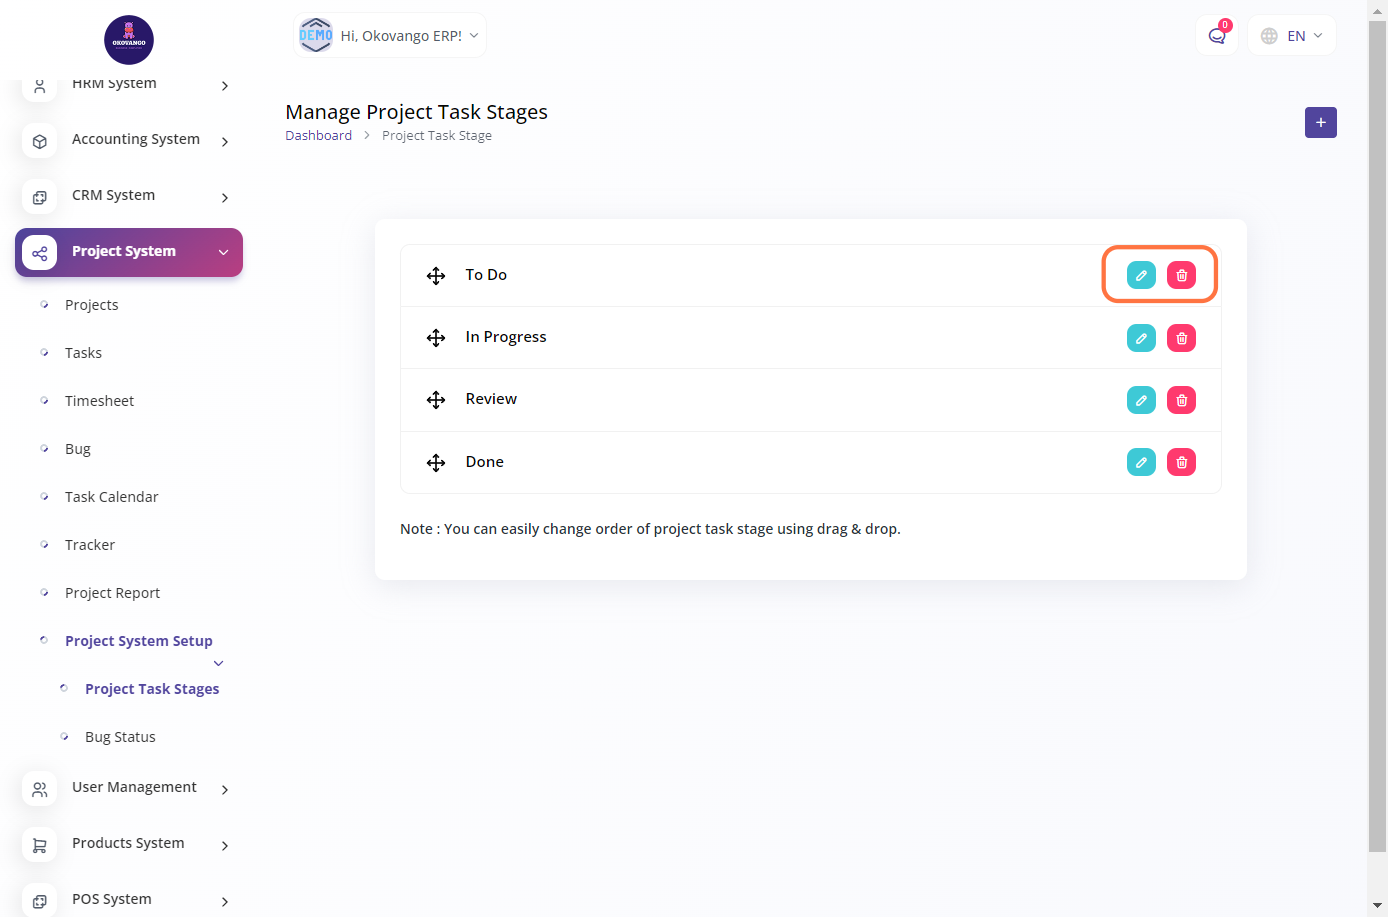
STEP 3: "Edit or Delete" Button
Editing allows you to modify the name or color of an existing task stage to better align with your project requirements. Deleting a task stage removes it from the system, ensuring that it is no longer available for selection or associated with any tasks. These options provide flexibility and customization in managing your project task stages according to your evolving needs.
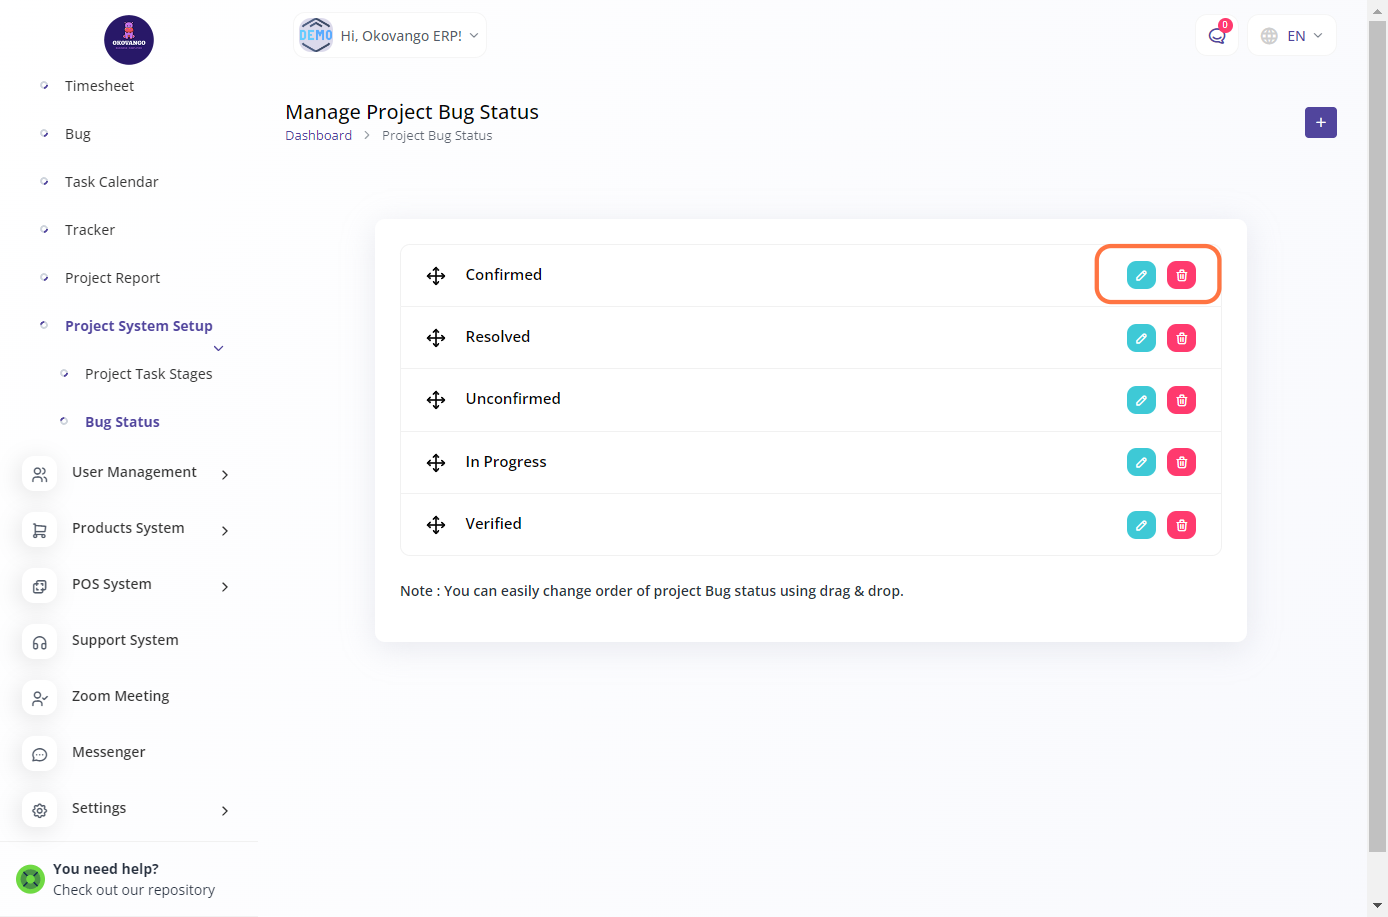
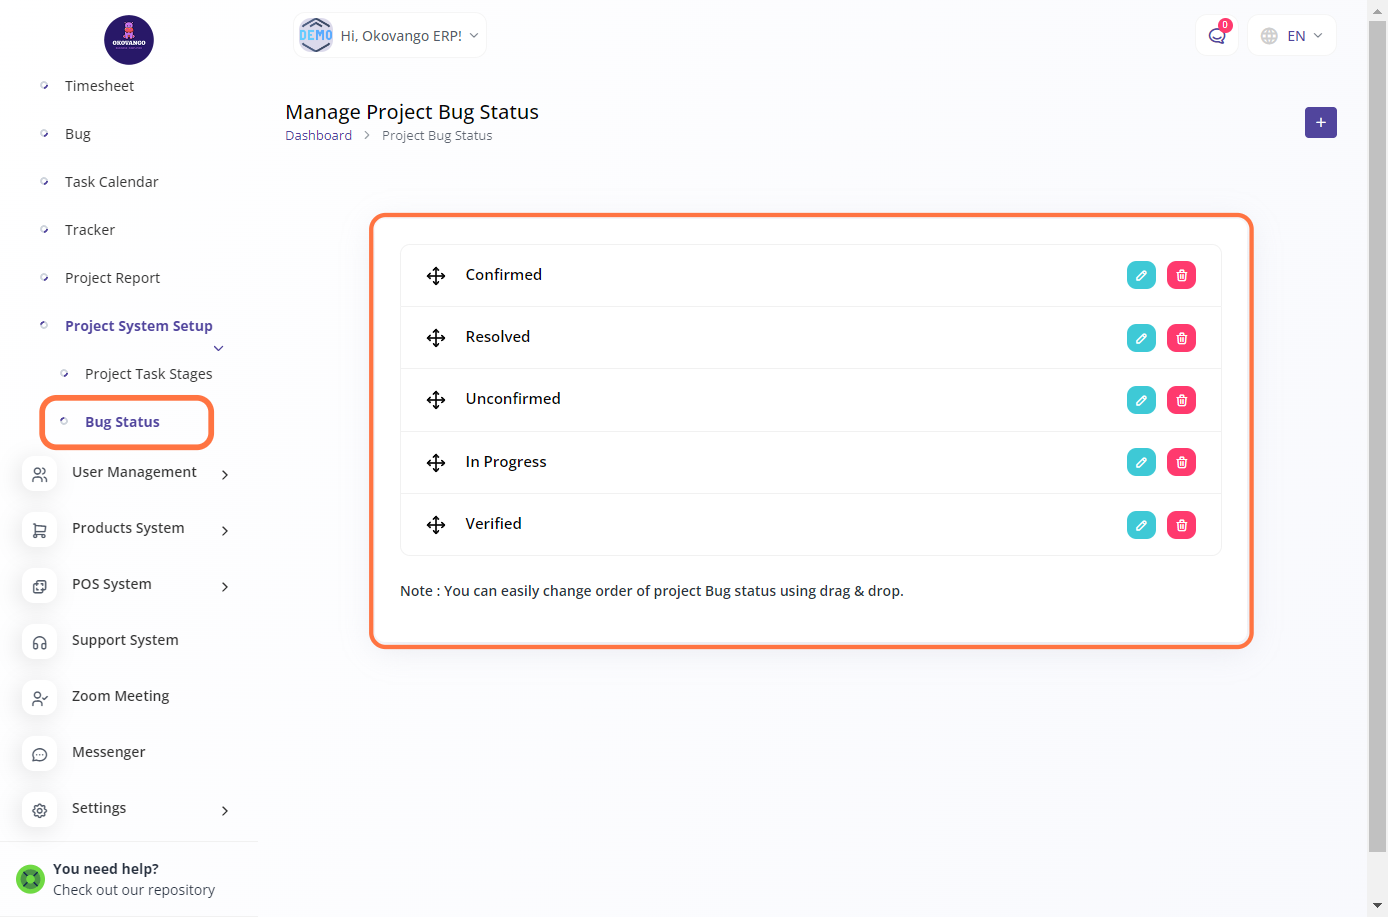
Bug Status
You have the ability to set up bug statuses. Bug statuses help track and manage the progress of reported issues or bugs within a project. You can create different statuses such as "New," "In Progress," "Resolved," or "Closed" to reflect the various stages of bug resolution. This allows you to effectively monitor and communicate the status of bugs, ensuring timely resolution and a smooth project workflow. You can also edit or delete bug statuses as needed to align with your project management requirements.
Step 1: Click the "Create" Button
STEP 2: Create New Bug Stages
After clicking the create button, you can proceed to set up the bug stage by following these steps:
- Enter the title of the bug status.
- Click the create button to finalize the creation of the bug stage.
This allows you to define and customize the bug statuses according to your project's needs, ensuring effective bug tracking and resolution.

STEP 3: "Edit or Delete" Button
Once you have created the bug stage, you have the flexibility to edit or delete it as needed. This allows you to modify the bug status or remove it if it is no longer required.