Configure Various System Settings
You can configure various aspects of the system to meet your specific requirements. You can define user roles and permissions to control access and restrict certain functionalities. The settings also allow you to manage email templates and notifications for different system events. Furthermore, you can integrate external services and APIs, such as payment gateways or shipping providers, to streamline your business processes. Overall, the ERP system settings provide flexibility and customization options to align the system with your organization's needs.

Brand Setting
In the brand setting section, you can configure your brand's appearance and customization options. The following steps guide you through the setup process:
- Choose or upload your logo to represent your brand.
- Set the title text that will be displayed in the header or top bar of your application.
- Specify the footer text, which usually includes copyright or additional information about your brand.
- Enable RTL (Right-to-Left) support if you need to accommodate languages that are written from right to left.
- Utilize the theme customizer to adjust the primary color setting, allowing you to define the main color scheme of your application.
- Configure the sidebar setting to determine the position and behavior of the sidebar, such as whether it should be fixed or collapsible.
- Customize the layout setting, which controls the overall arrangement and structure of the application's interface.
- Finally, click on the create button to save and apply your brand settings.
These settings help you create a personalized and branded experience for your ERP system, aligning it with your company's identity and preferences.

System Settings
To set up the system settings in your ERP system, follow these steps:
- Specify the currency you want to use by selecting it from the available options.
- Define the currency symbol that represents your chosen currency.
- Choose the currency symbol position, such as whether it should appear before or after the amount.
- Set the desired date format that will be used throughout the system.
- Determine the time format to be used, including the display of hours, minutes, and seconds.
- Configure prefixes for various documents, such as invoices, proposals, purchases, POS transactions, bills, customers, vendors, and journals.
- Customize the title that appears in the footer of invoices and bills.
- Define the decimal number format, specifying the number of decimal places and the separator character.
- Set a prefix for journals, which are used for recording financial transactions.
- Enter the application URL to ensure correct links and references within the system.
- Specify the tracking interval for any tracking or monitoring functionality.
- Add any additional footer notes for invoices and bills.
By completing these steps, you can tailor the system settings to align with your specific requirements, including currency, date and time formats, prefixes, and other configuration options.
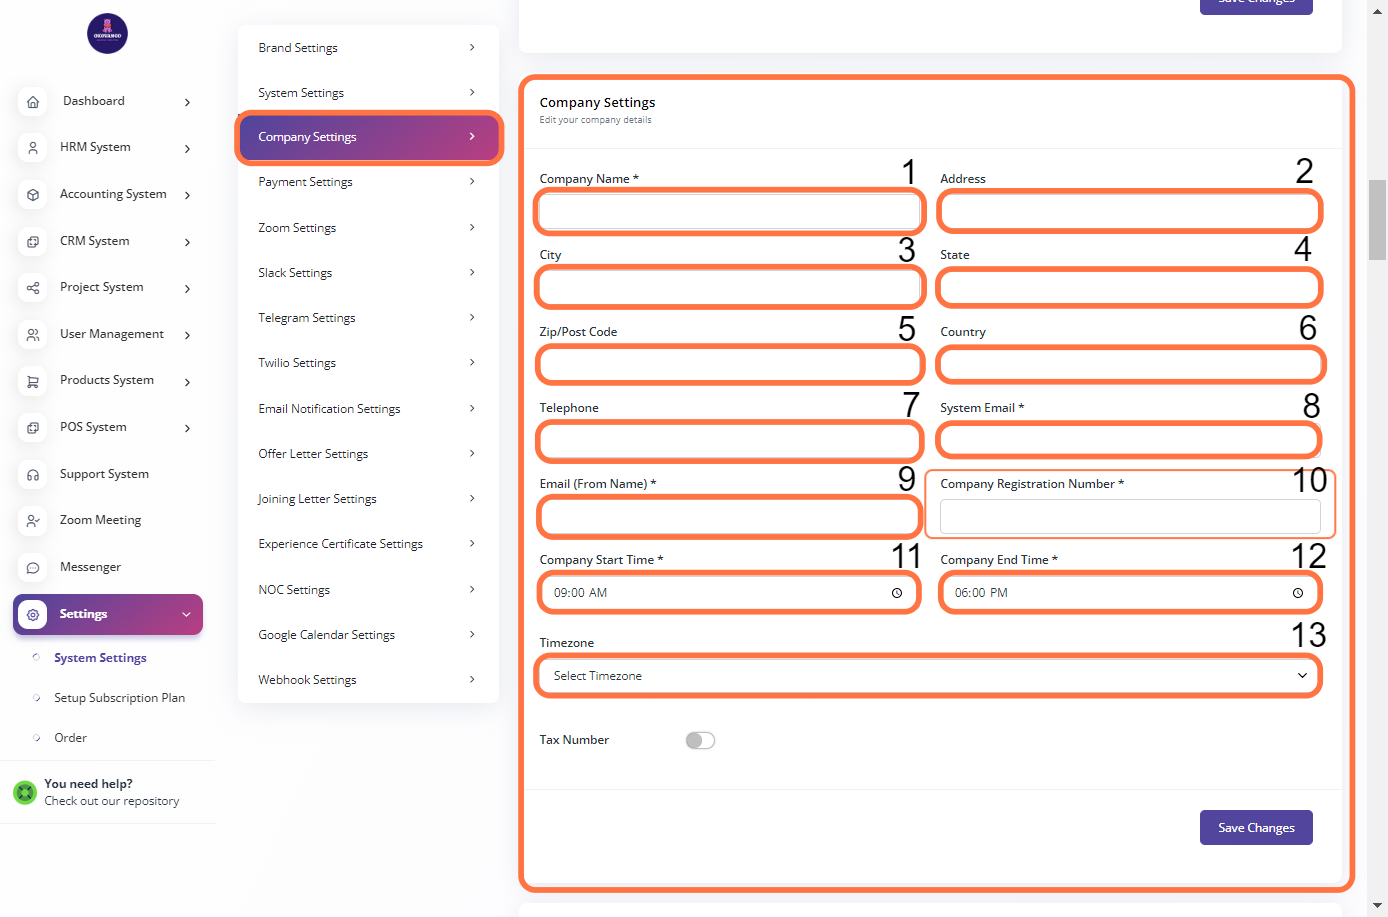
Company Setting
To set up the company settings in your ERP system, follow these steps:
- Enter the company name, which represents the name of your organization.
- Provide the company address, including the street address, building number, and any additional details.
- Specify the city where your company is located.
- Enter the state or region where your company operates.
- Provide the postal or ZIP code associated with your company's location.
- Specify the country where your company is based.
- Enter the telephone number for your company's main contact or reception.
- Provide the system email address, which is used for system-generated notifications and communication.
- Enter the email from name, which represents the sender name for outgoing emails from the system.
- Specify the company registration number, which is the unique identifier for your company in the relevant jurisdiction.
- Set the company start time, representing the official start time or opening hours of your company.
- Set the company end time, representing the official end time or closing hours of your company.
- Choose the appropriate timezone for your company's location.
By completing these steps, you can configure the company settings in your ERP system, ensuring accurate and relevant information is associated with your organization, such as contact details, operating hours, and timezone.
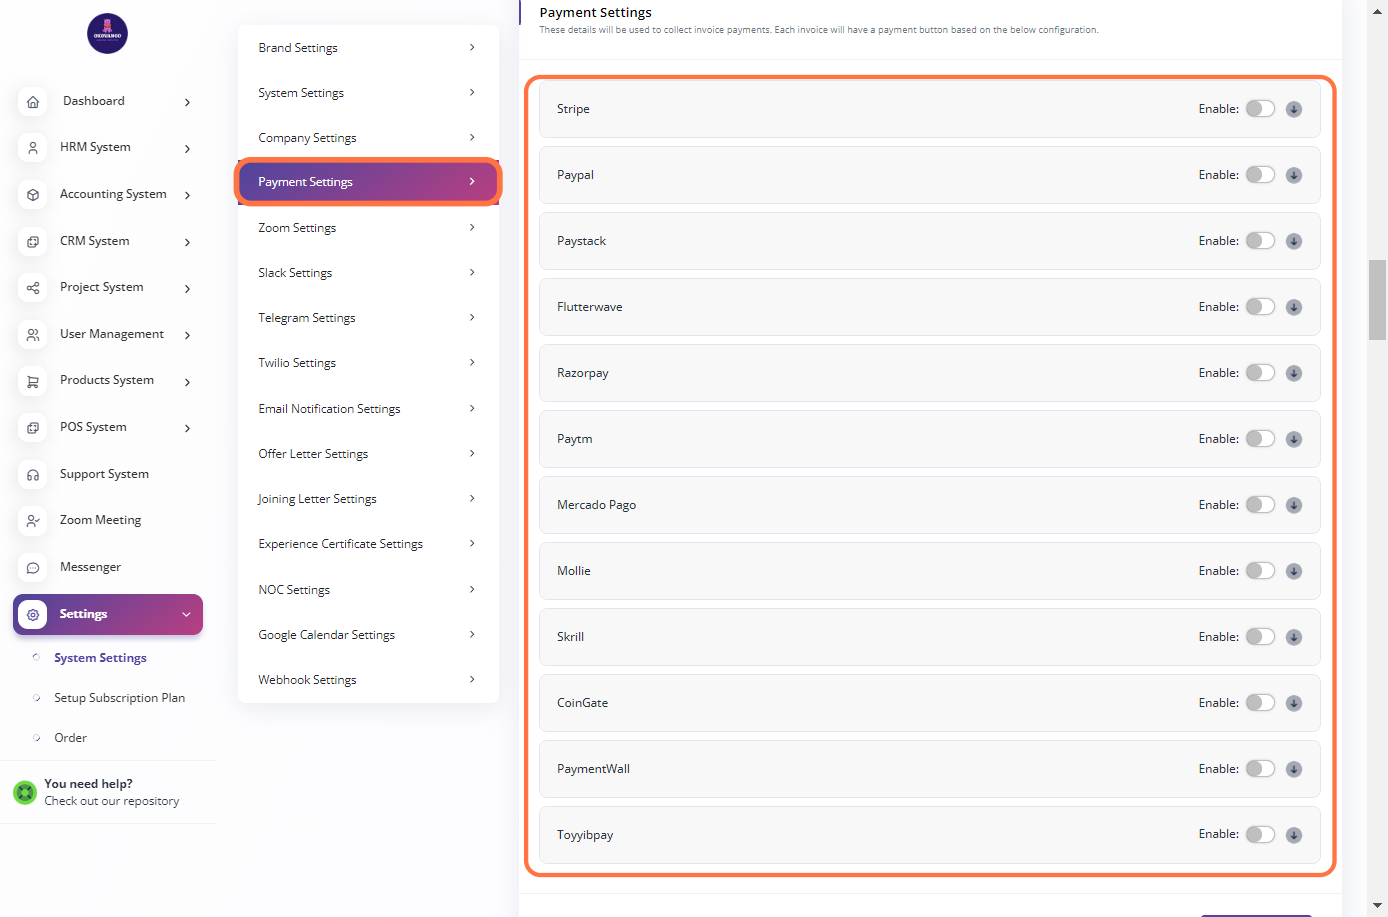
Payment Setting
You have the option to enable or disable specific payment methods or features. By enabling a payment method, you make it available for use in transactions and allow customers or users to make payments using that method. Conversely, disabling a payment method removes it as an available option for transactions.
Zoom Setting
To set up the Zoom integration in your ERP system, follow these steps:
- Enter the Zoom API key in the designated field in the ERP system.
- Enter the Zoom API secret in the corresponding field in the ERP system.
By providing the Zoom API key and secret, you establish the connection between your ERP system and Zoom, enabling integration features and functionality such as scheduling and managing Zoom meetings or webinars directly from within the ERP system.

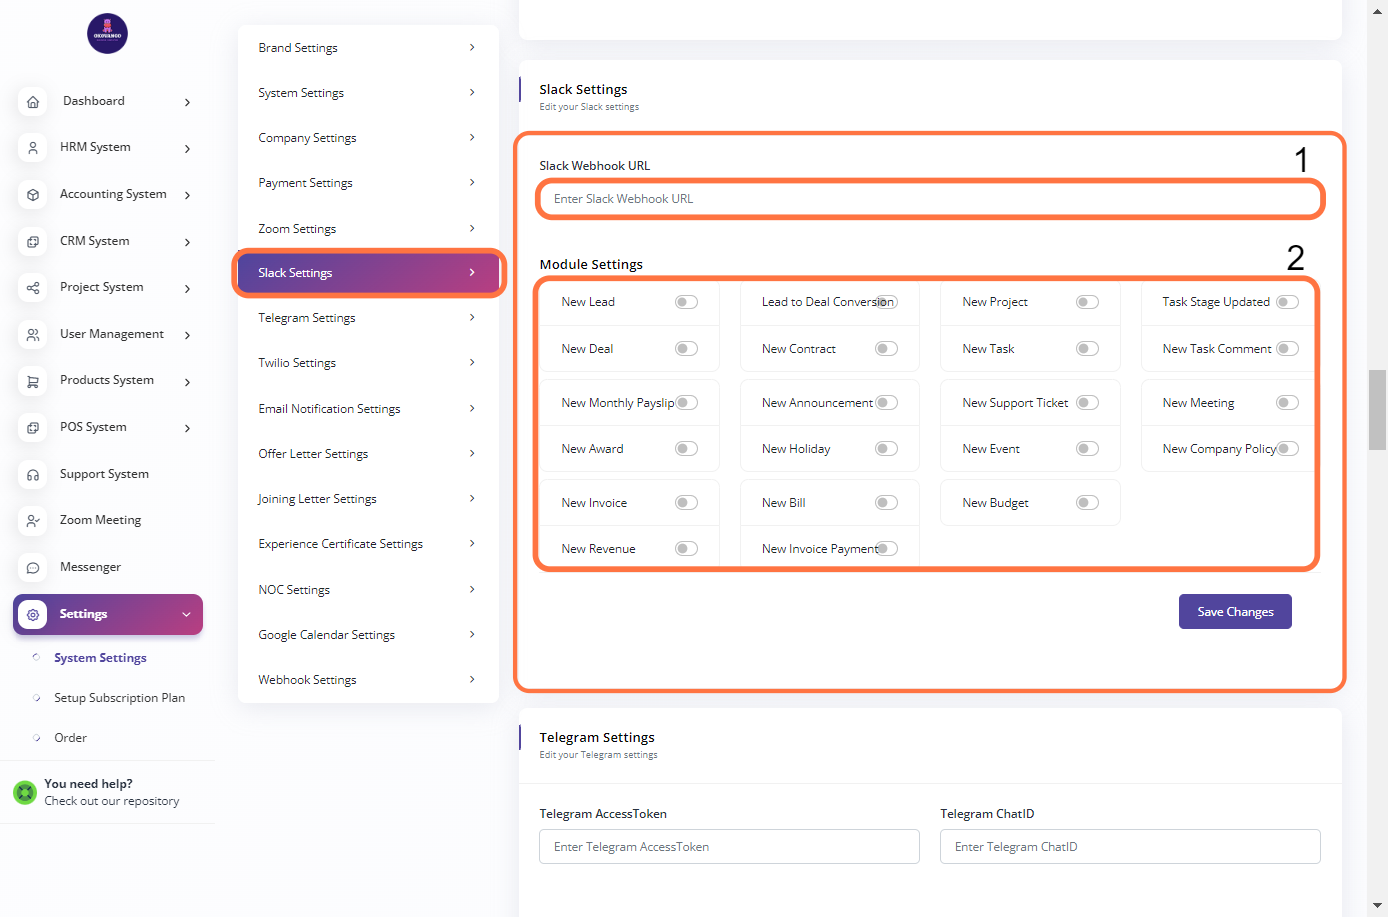
Slack Setting
To set up Slack integration in your ERP system, follow these steps:
- Enter the Slack webhook URL in the designated field in the ERP system.
- Enable or disable the desired module settings for Slack integration.
By providing the Slack webhook URL, you establish a connection between your ERP system and Slack, allowing you to receive notifications, updates, or messages from the ERP system directly in Slack channels. Enabling or disabling module settings determines which ERP system events or actions trigger notifications to be sent to Slack.
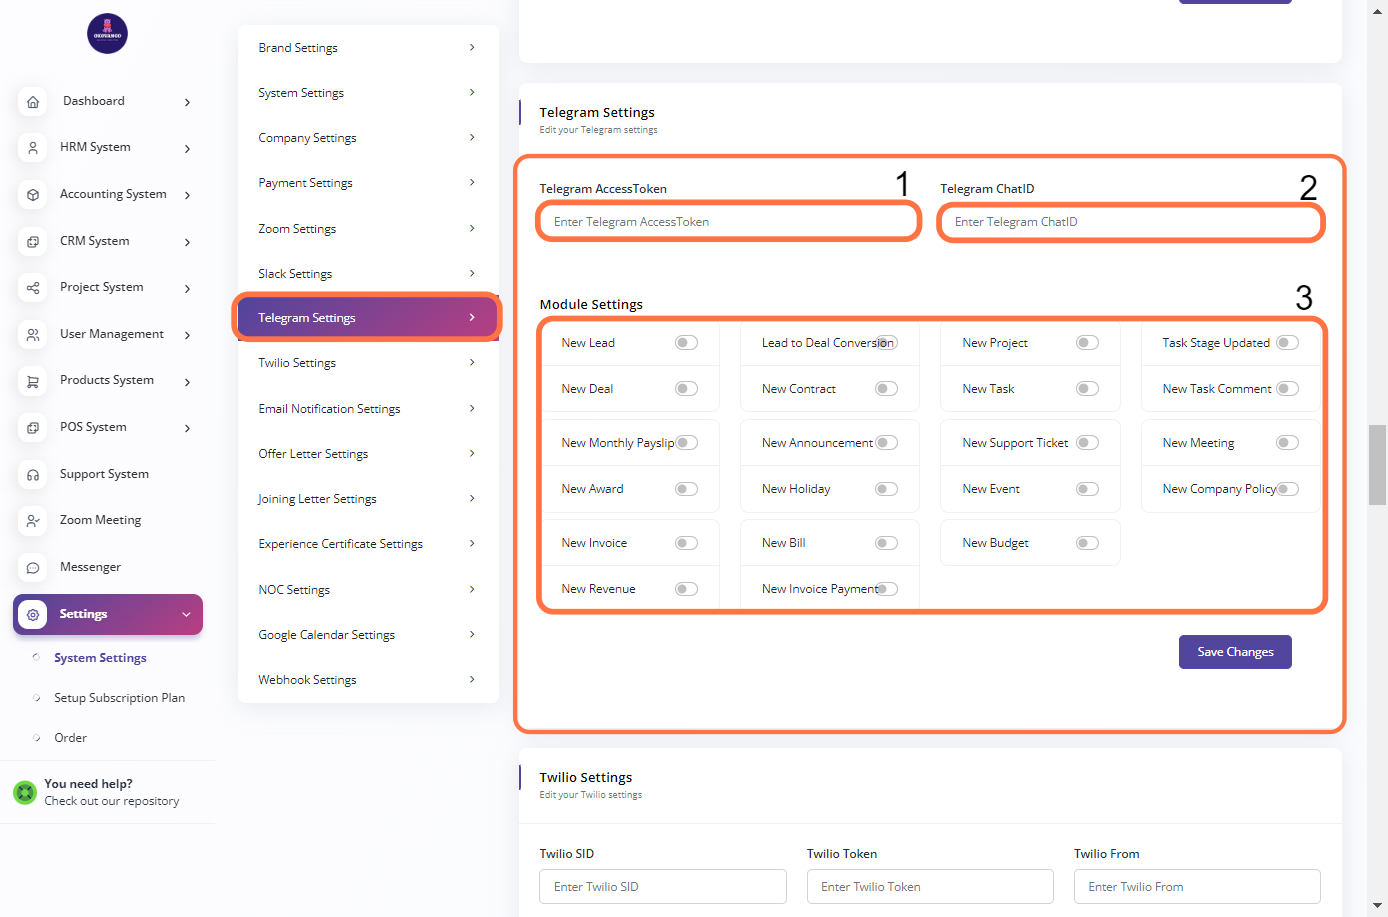
Telegram Setting
To set up Telegram integration in your ERP system, follow these steps:
- Enter the Telegram access token in the designated field in the ERP system.
- Enter the Telegram chat ID in the designated field in the ERP system.
- Enable or disable the desired module settings for Telegram integration.
By providing the Telegram access token and chat ID, you establish a connection between your ERP system and Telegram, enabling you to receive notifications, updates, or messages from the ERP system in your Telegram chats. Enabling or disabling module settings determines which ERP system events or actions trigger notifications to be sent to Telegram.
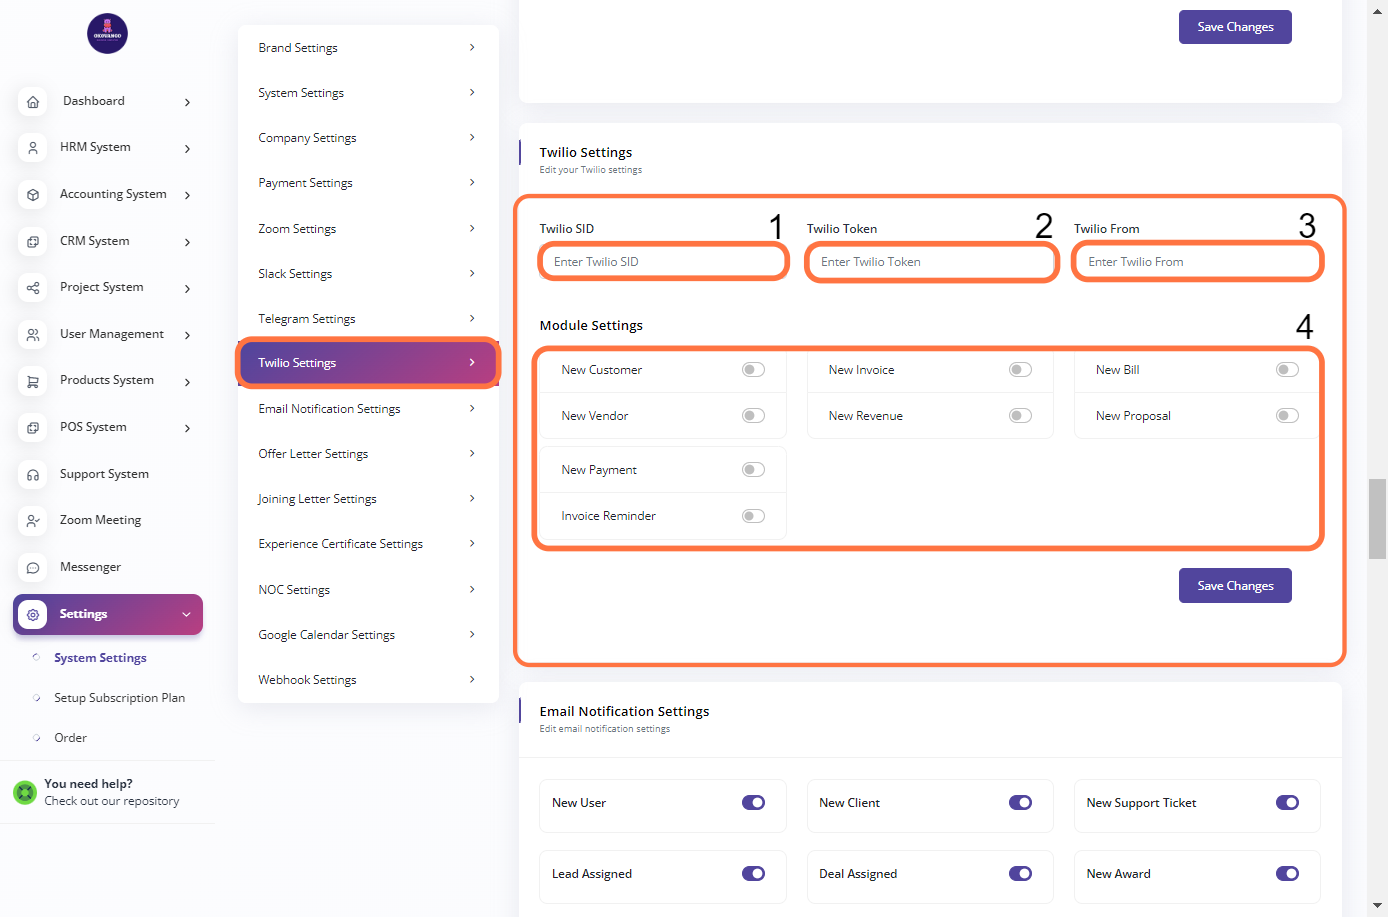
Twilio Setting
To set up Twilio integration in your ERP system, follow these steps:
- Enter your Twilio SID and token in the designated fields in the ERP system.
- Specify the Twilio phone number or sender ID to be used in the "Twilio From" field.
- Enable or disable the desired module settings for Twilio integration.
By providing the Twilio SID, token, and phone number, you establish a connection between your ERP system and Twilio, enabling you to send SMS notifications or messages from the ERP system using Twilio's messaging service. Enabling or disabling module settings determines which ERP system events or actions trigger SMS notifications to be sent via Twilio.
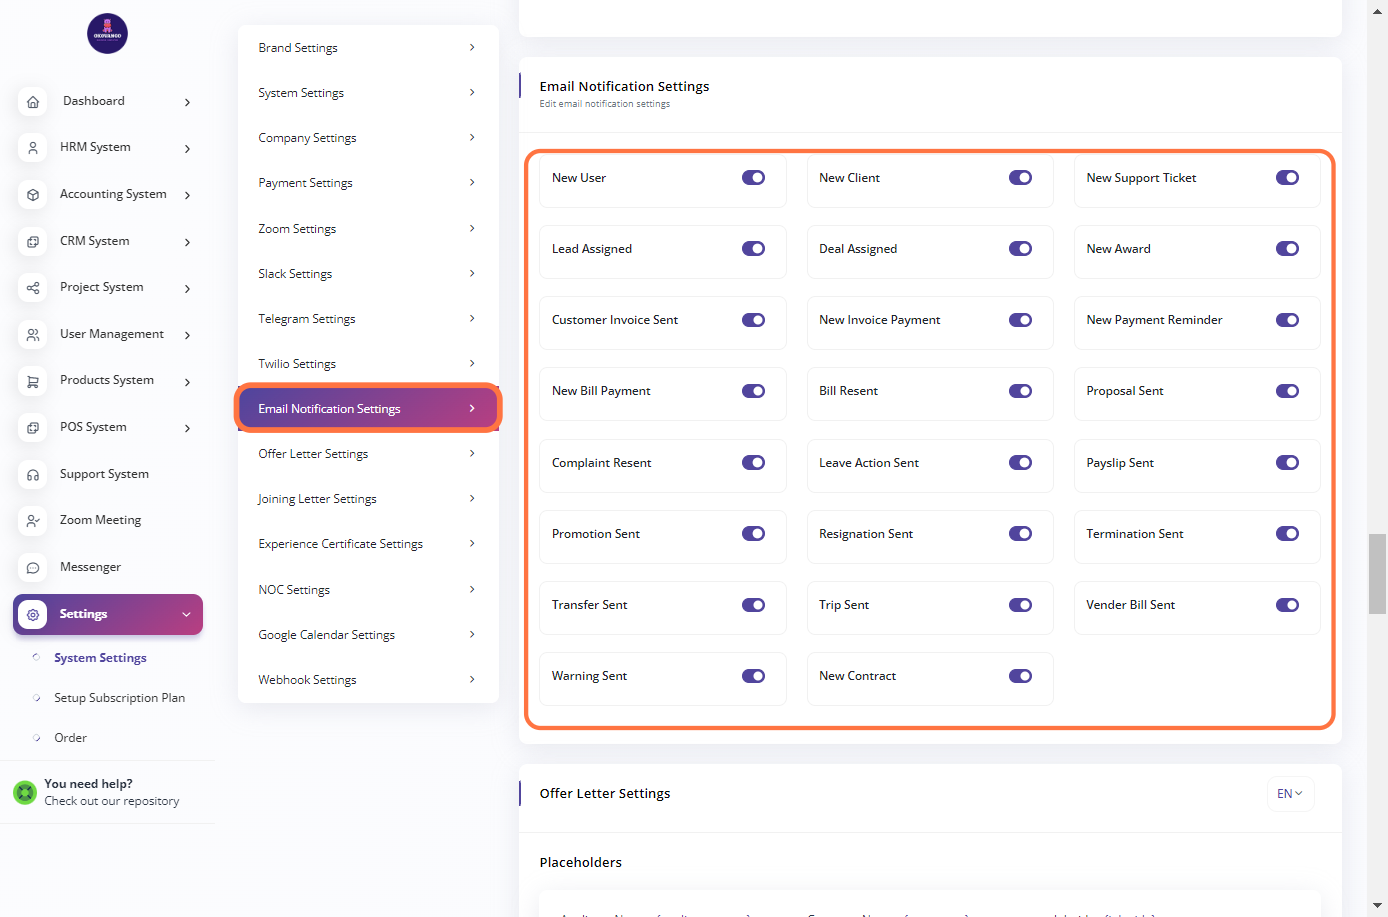
Email Notification Setting
Enabling email notifications ensures that you receive important system alerts, updates, and notifications via email. Disabling email notifications means you won't receive any email notifications from the ERP system. Adjust the settings based on your communication preferences and requirements.
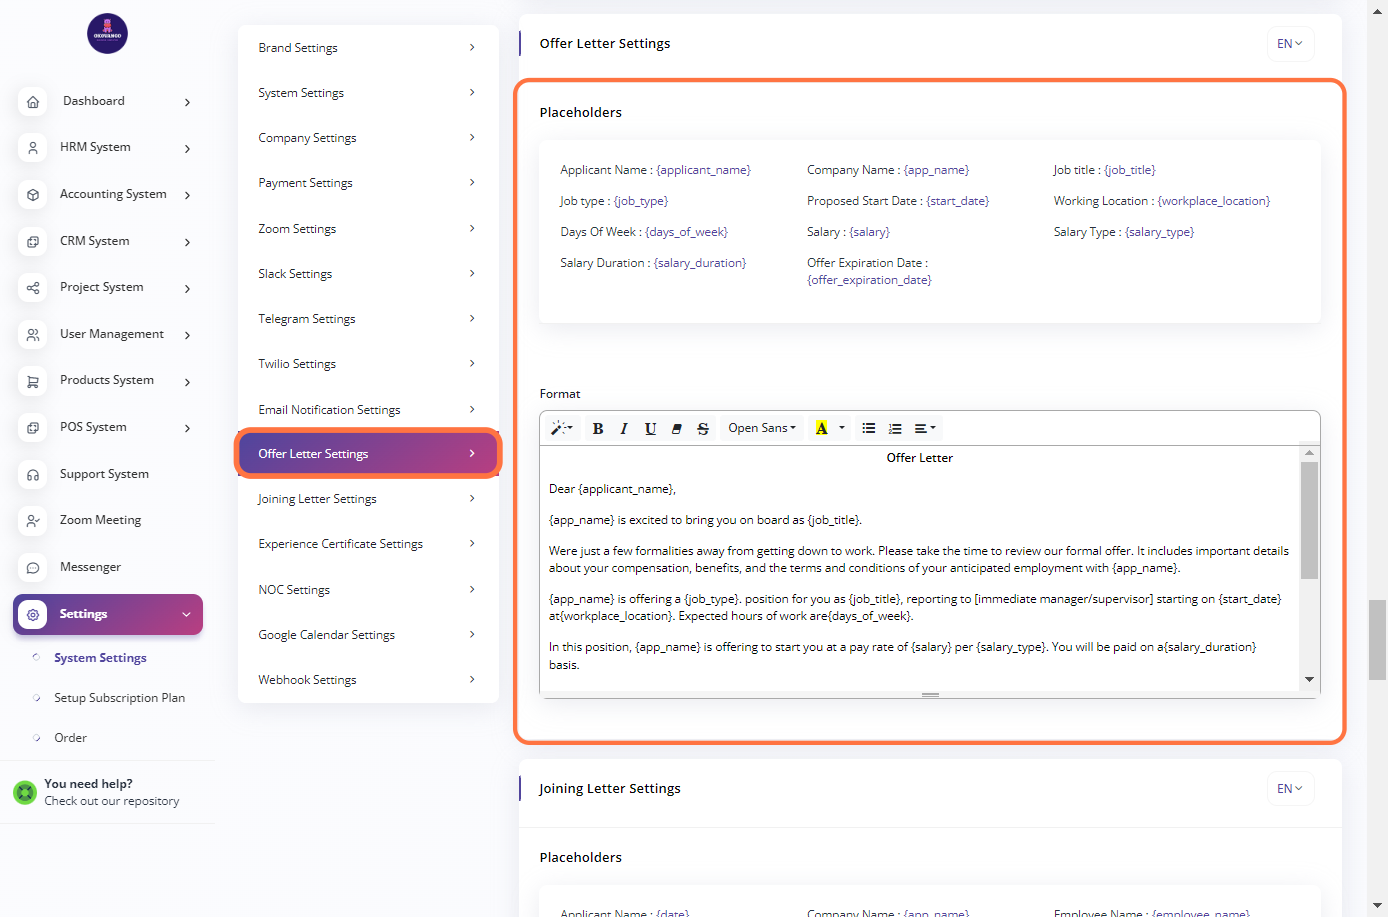
Offer Letter Setting
Setting up offer letter settings allows you to generate standardized and personalized offer letters for candidates in a streamlined manner. It helps ensure consistency and accuracy in the content and formatting of offer letters sent to potential employees.
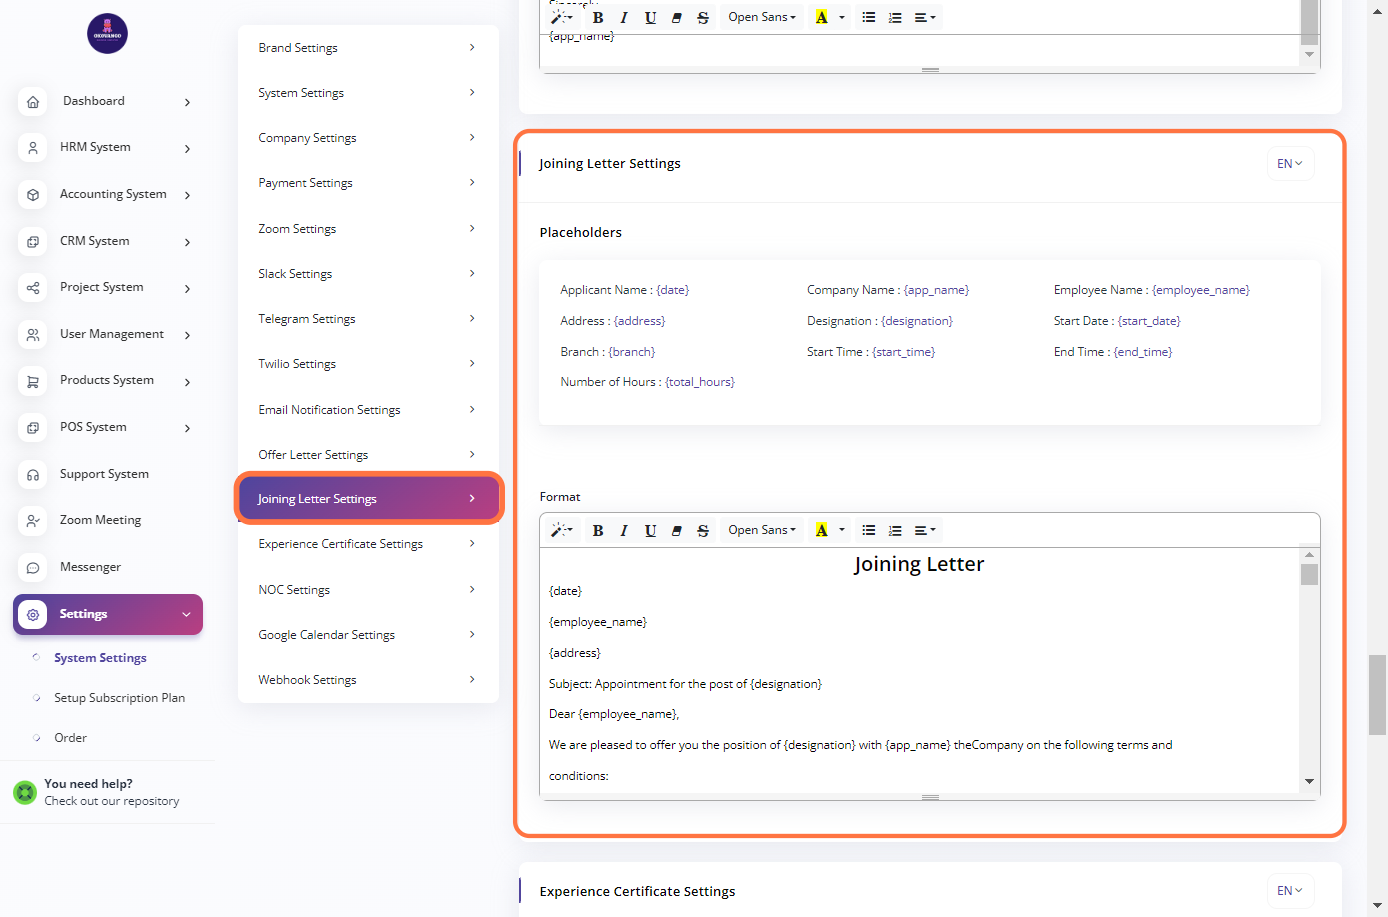
Joining letter setting
Setting up joining letter settings allows you to generate standardized and personalized joining letters for new employees, ensuring a smooth and professional onboarding process. It helps provide essential information to new hires and sets the right expectations for their joining and initial days at the company.
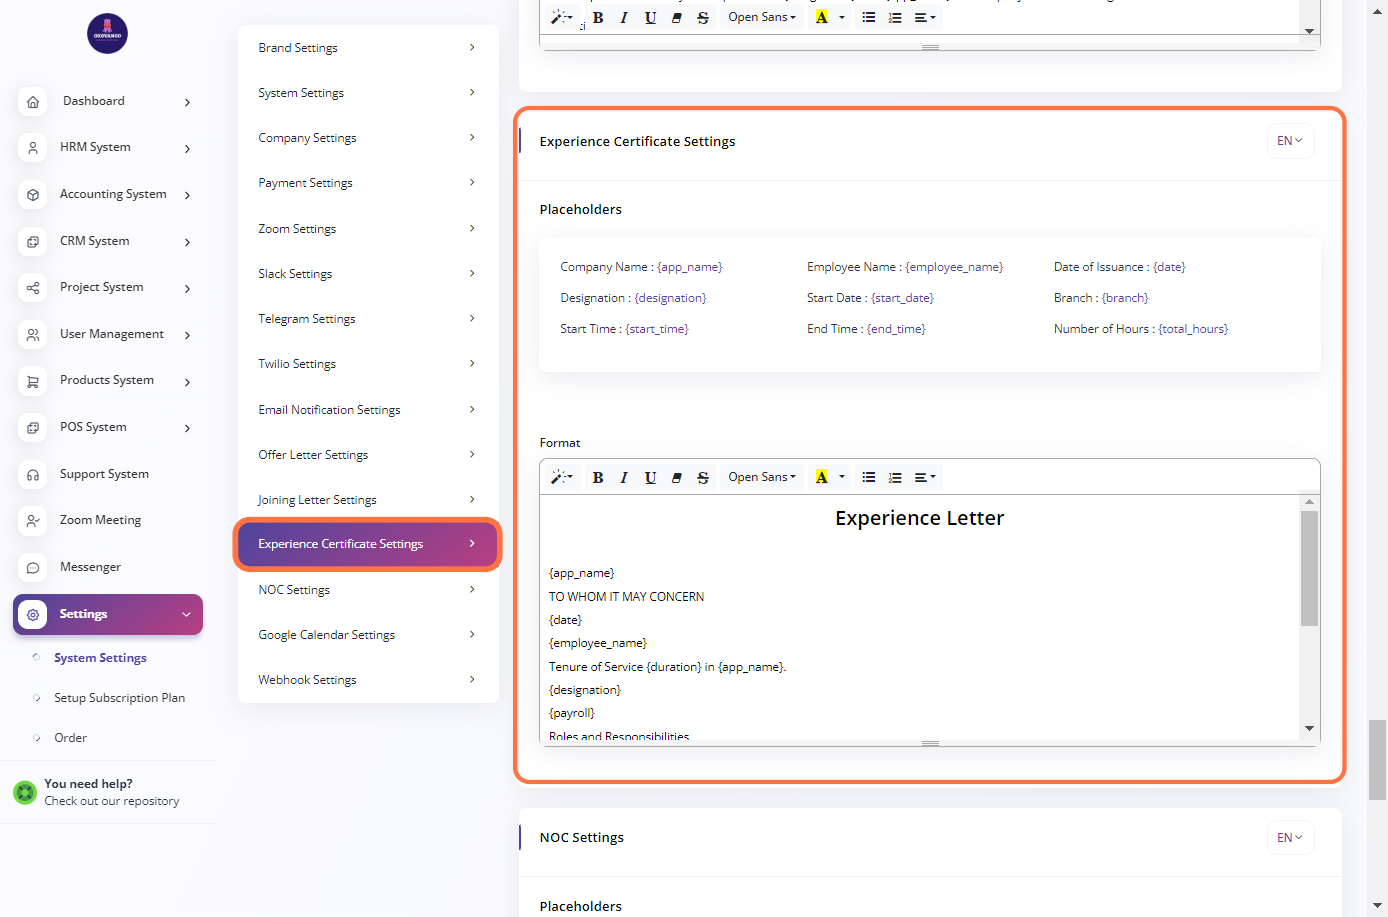
Experience Certification Settings
Setting up experience certification letter settings allows you to generate standardized and professional experience certificates for employees who have completed their tenure with the company. It helps verify and validate their work experience, which can be valuable for future employment opportunities.
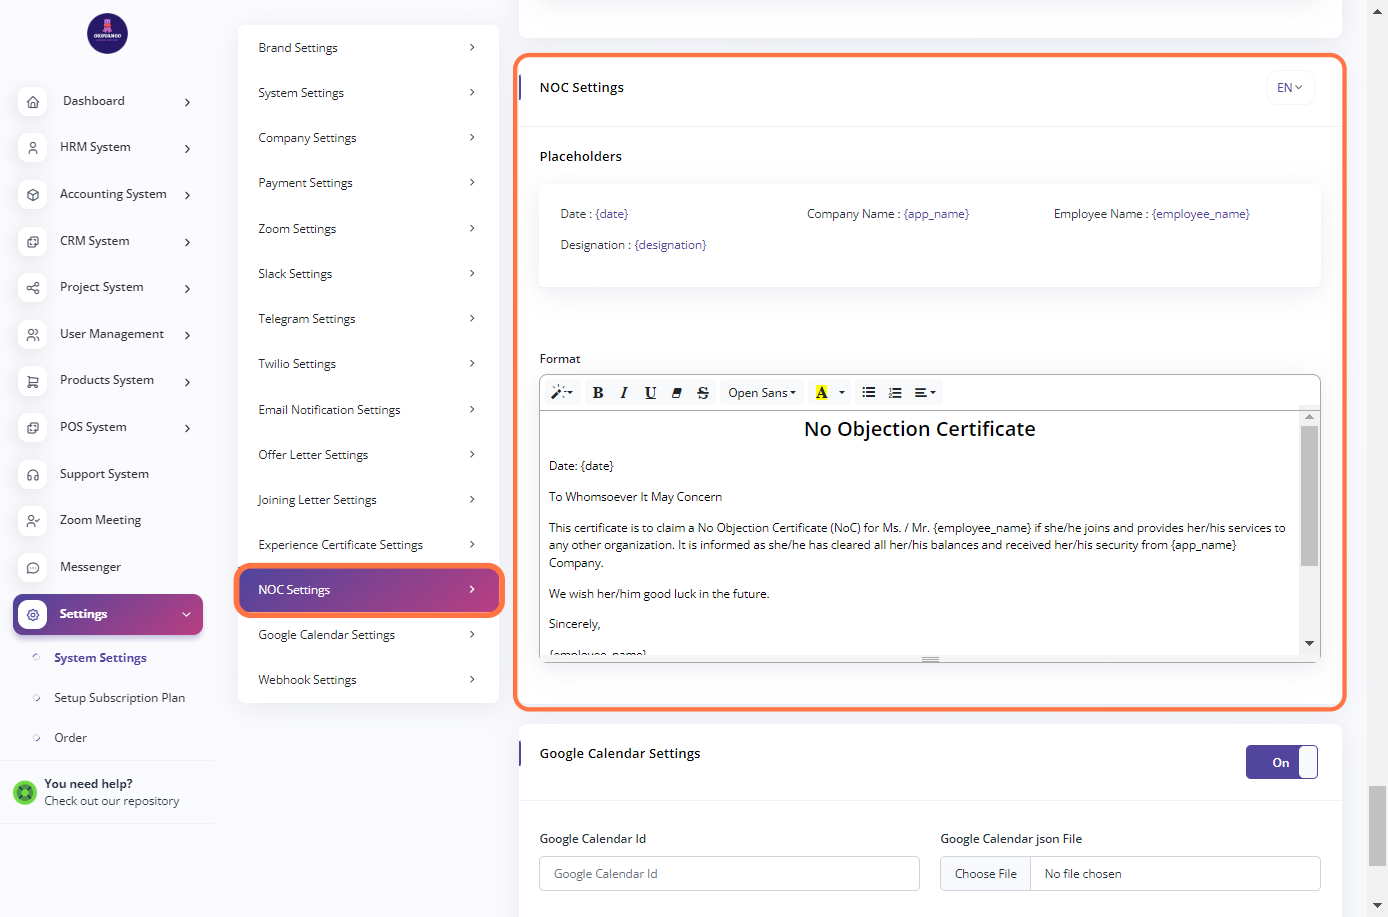
NOC Settings
Setting up NOC settings allows you to generate standardized and professional No Objection Certificates for various purposes, such as employee transfers, visa applications, or project approvals. It helps streamline the process of issuing NOCs and ensures consistency in the content and format of the certificates.
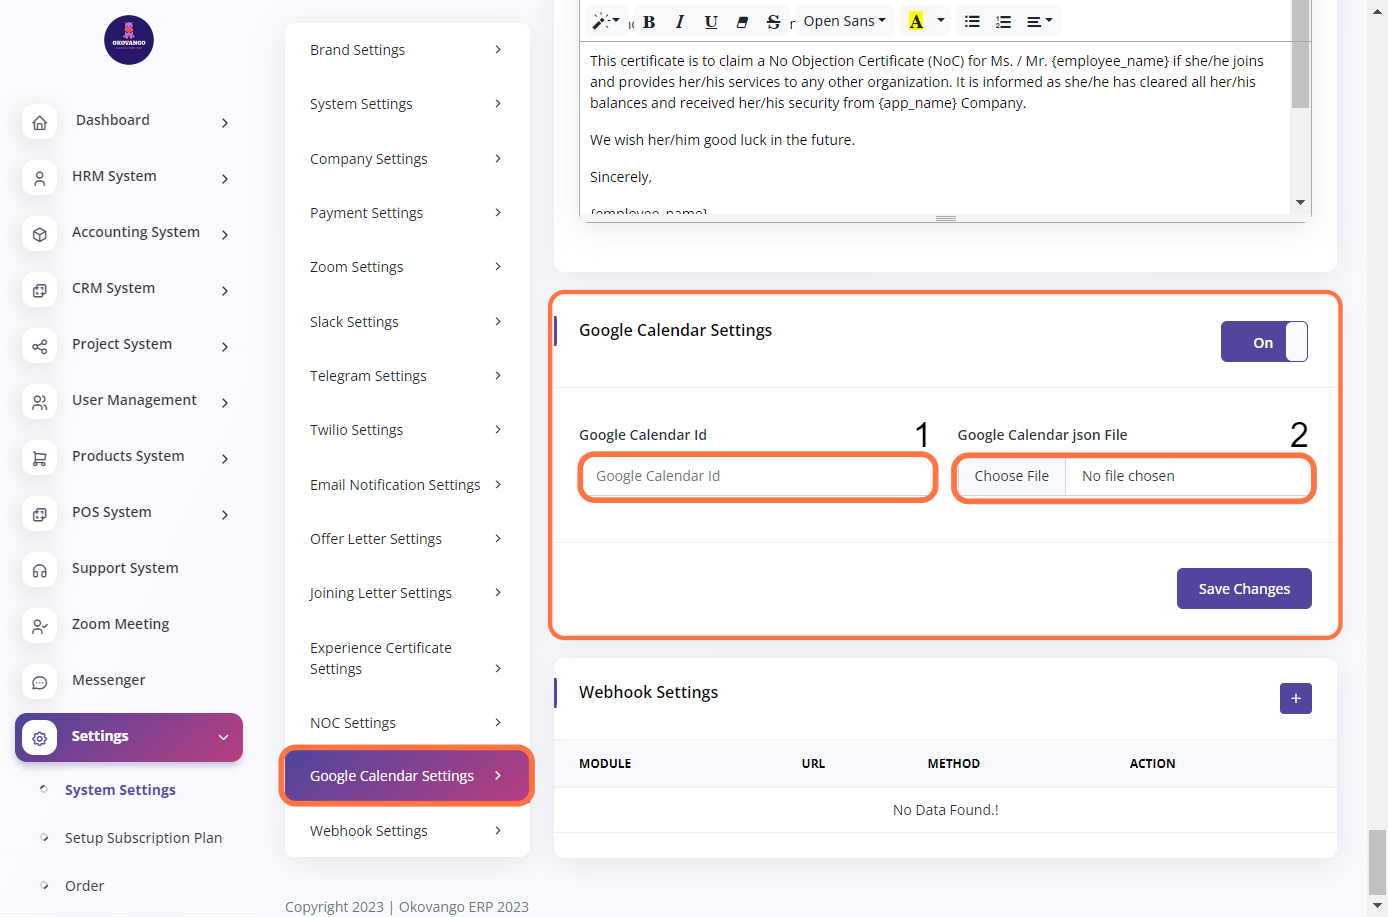
Google Calendar Setting
To set up Google Calendar integration in your ERP system, follow these steps:
1. This is the unique identifier for your Google Calendar. You can find it in your Google Calendar settings or by accessing your calendar's URL.
2. Generate a Google Calendar JSON file: Go to the Google API Console and create a new project. Enable the Google Calendar API for your project and generate the necessary credentials. Download the JSON file containing the credentials.
3. Enter your Google Calendar ID in the designated field.
4. Save the Google Calendar settings to apply the changes.
Setting up Google Calendar integration allows your ERP system to synchronize events, tasks, or appointments with your Google Calendar. It enables you to manage and view your schedule seamlessly within your ERP system and Google Calendar simultaneously.
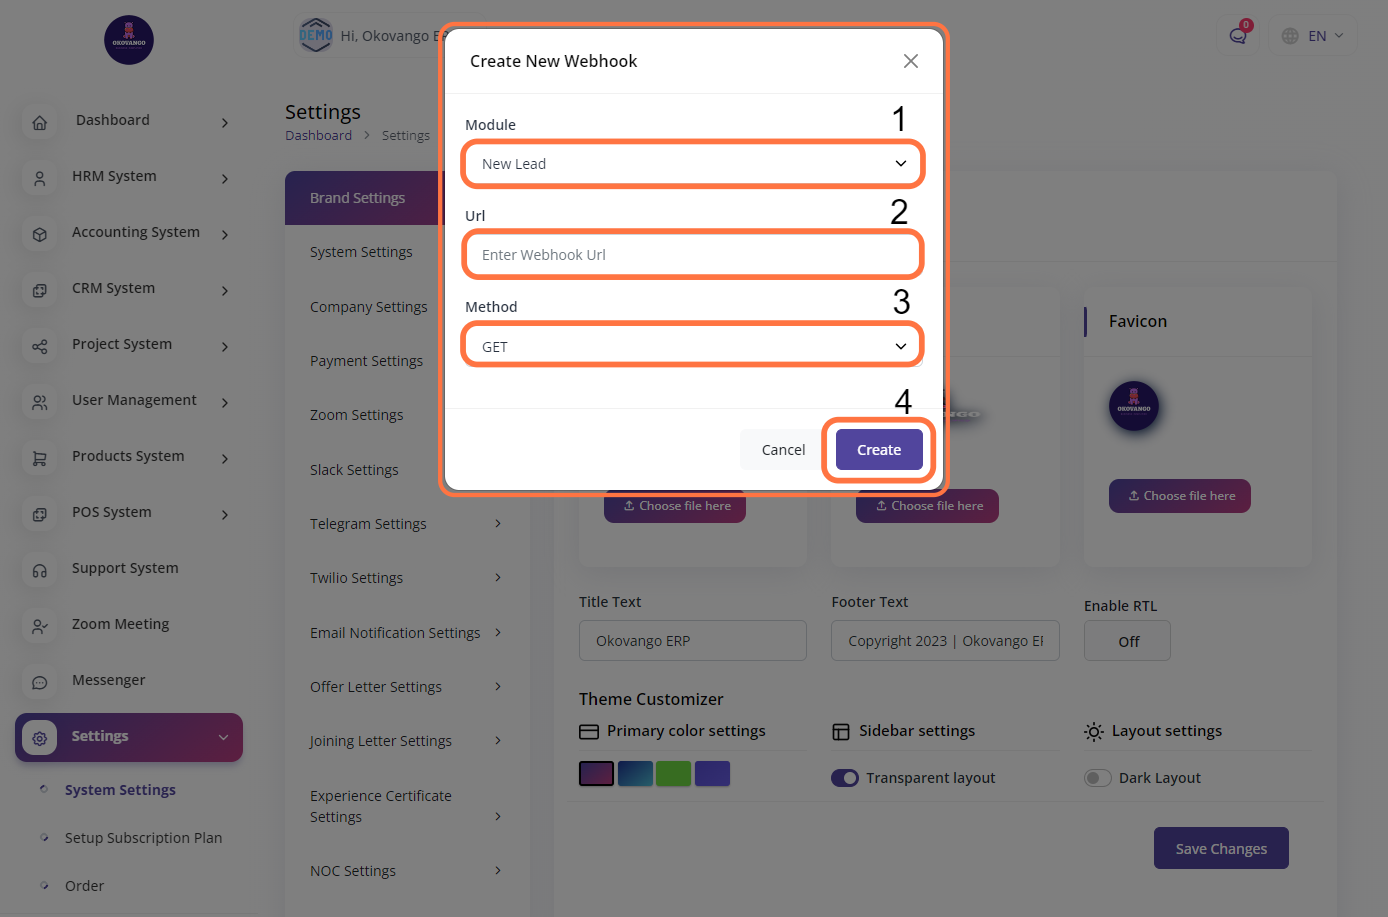
Webhook Setting
To create a webhook in your ERP system, follow these steps:
- Select the module for which you want to create the webhook. This can be a specific feature or functionality within your ERP system.
- Enter the URL of the endpoint where the webhook data will be sent. This could be an external system or service that will receive and process the webhook payload.
- Choose the appropriate HTTP method for the webhook request, such as POST, GET, PUT, or DELETE. This determines how the data will be sent to the specified URL.
- Click on the "Create" button to save and activate the webhook.
Creating a webhook allows your ERP system to send real-time notifications or data updates to external systems or services. It enables seamless integration and communication between your ERP system and other applications or platforms.