Steps to Create and Manage Job Postings
In the recruitment section, you can set up and manage the recruitment process for your organization. This feature allows you to define job positions, create job descriptions, and track the progress of candidates throughout the recruitment process. You can enter details such as jobs, job create, job application, job candidate, job on-boarding, custom question, interview schedule and career. This helps in attracting and selecting suitable candidates for available positions within your organization.

Jobs
In the job creation section, you can create new job positions for your organization. This feature allows you to define the details of the job, including the job title, department, location, responsibilities, qualifications, and other relevant information. By providing comprehensive job descriptions, you can attract qualified candidates and effectively communicate the expectations and requirements of the position. This facilitates the recruitment process and helps in finding the right fit for the job within your organization.

STEP 1: Click on "Create" Button
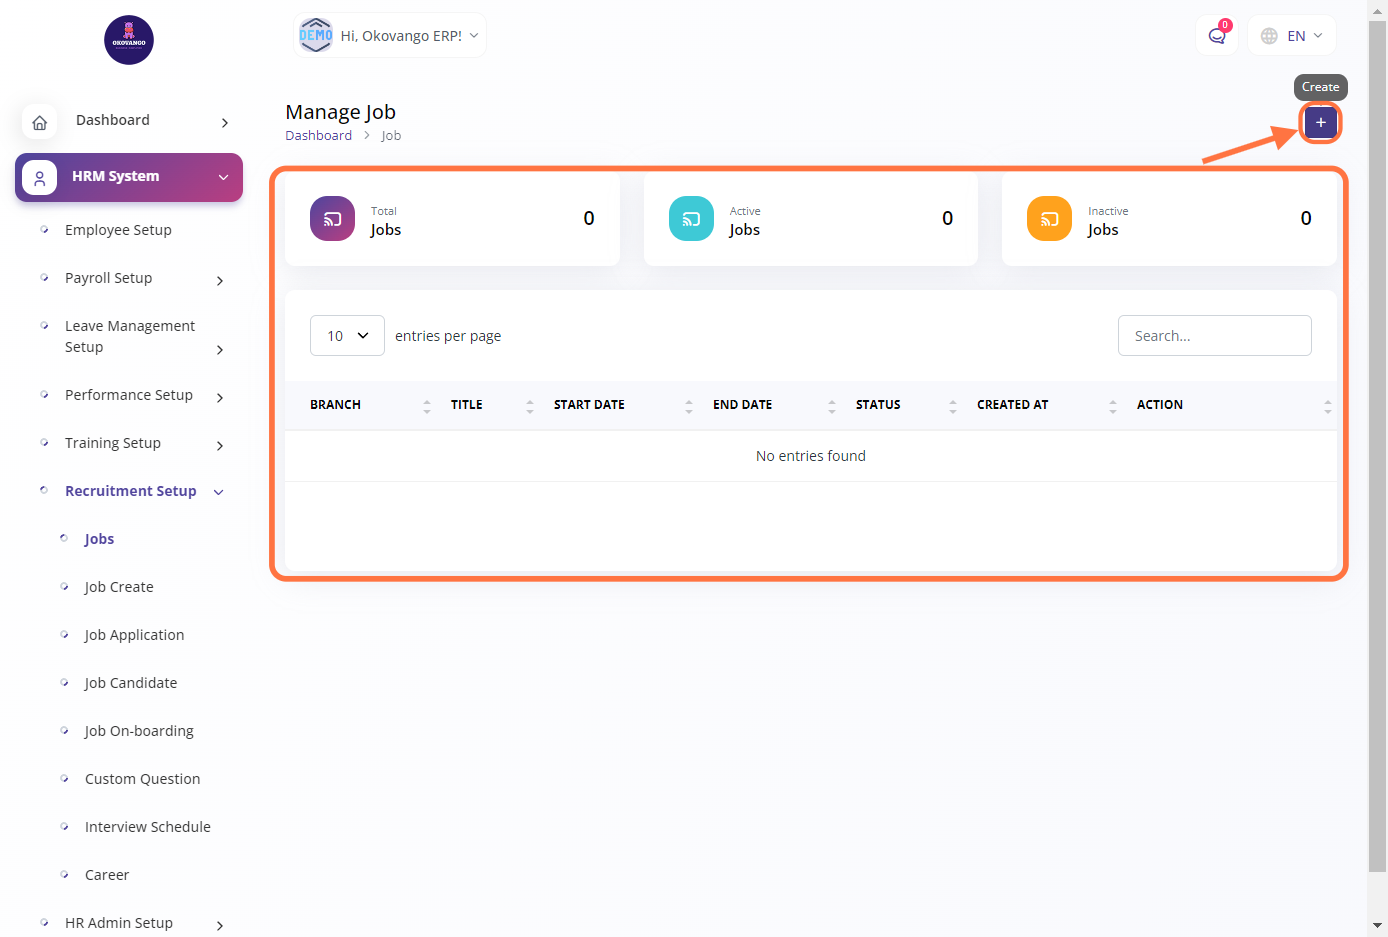
STEP 2: Create a New Job
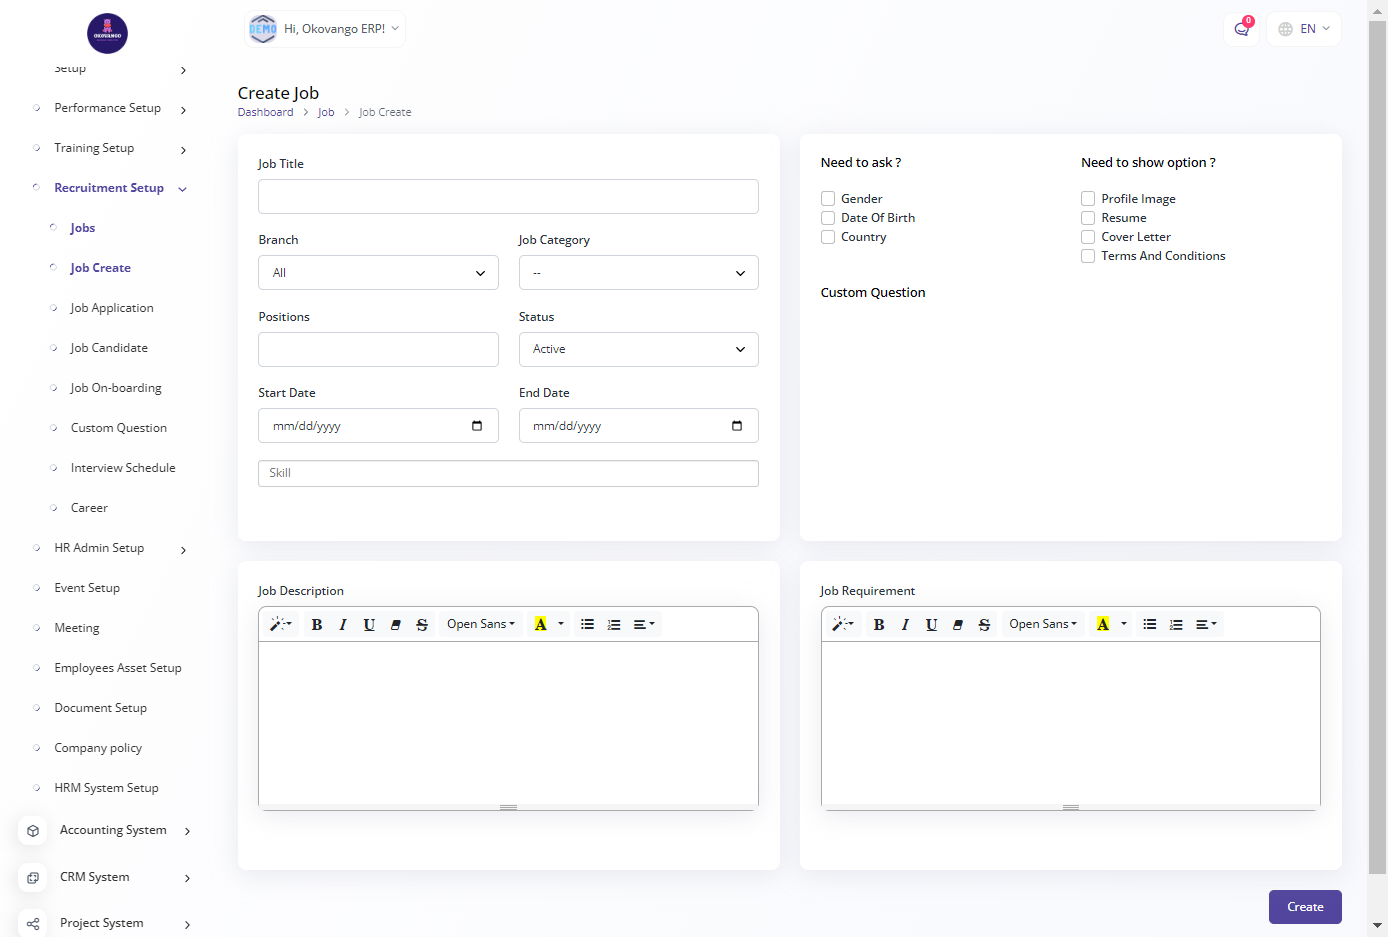
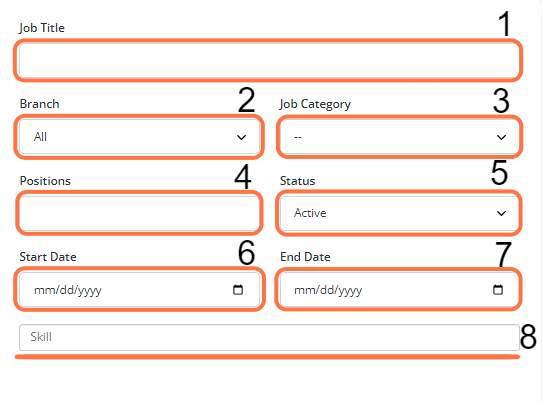
In this section, you can fill up the required form to create a job. You will need to provide the following information:
- Job title: Enter the title or name of the job position.
- Branch: Select the branch or location associated with the job.
- Job category: Choose the category or department to which the job belongs.
- Position: Select the specific position or role within the job category.
- Status: Choose the status of the job, such as full-time, part-time, or contractual.
- Start date: Select the desired start date for the job.
- End date: If applicable, select the end date for temporary or fixed-term positions.
- Skills: Provide the required or desired skills for the job position.
By filling in these details, you can create a job and define its specifications within your organization.
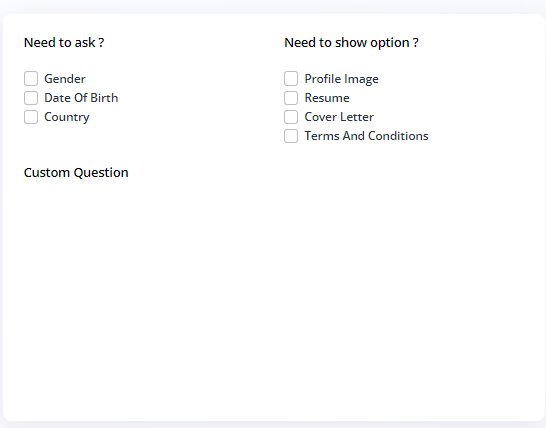
In addition to the job details, you can also configure the necessary question options for applicants. These options may include:
- Gender: Applicants can select their gender from provided options.
- Date of birth: Applicants can enter their date of birth or select it from a calendar.
- Country: Applicants can select their country of residence or nationality.
- Profile image: Applicants can upload a profile picture or avatar.
- Resume: Applicants can upload their resume or CV.
- Cover letter: Applicants can provide a cover letter or additional documents.
- Terms and conditions: Applicants can agree to the terms and conditions of the job application.
These question options allow you to gather specific information from applicants during the recruitment process.
You can provide a detailed job description and job requirements in this section. This includes:
-
Job Description: You can enter a comprehensive description of the job, outlining the roles, responsibilities, and tasks associated with the position. This helps applicants understand the nature of the job and their potential responsibilities.
-
Job Requirements: You can specify the qualifications, skills, and experience required for the job. This may include educational background, work experience, specific certifications, language proficiency, or any other relevant criteria.
Including a clear and informative job description and requirements helps potential applicants understand if they meet the necessary qualifications and if the job aligns with their skills and interests.

Job Application
In this section, you can create the job application form for applicants. This form typically includes fields for personal information such as name, contact details, and address. It may also include sections for educational background, work experience, skills, and qualifications. The job application form is designed to gather relevant information from applicants to assess their suitability for the job position.
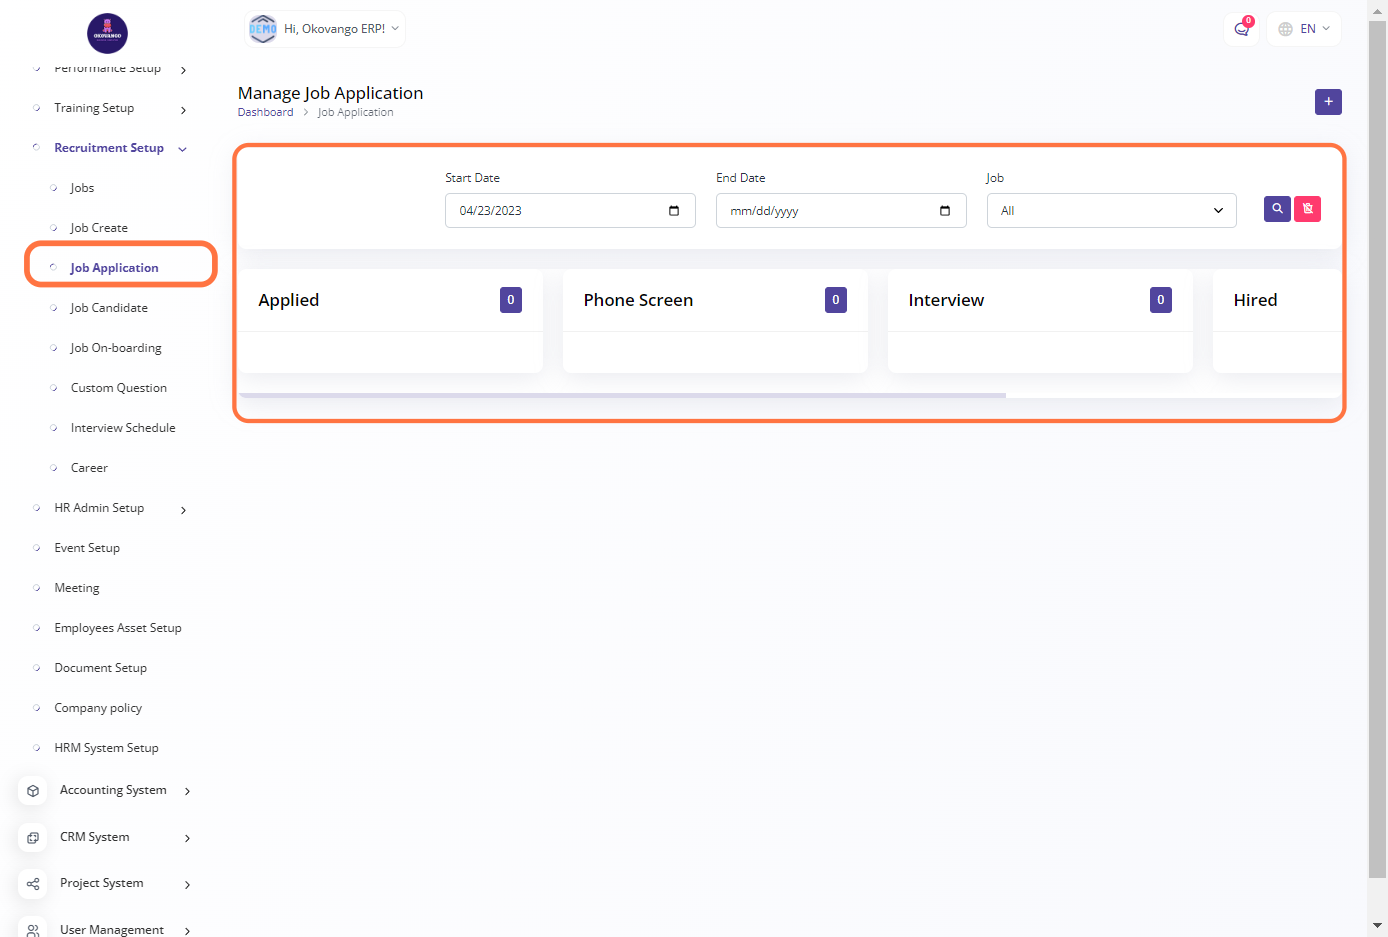
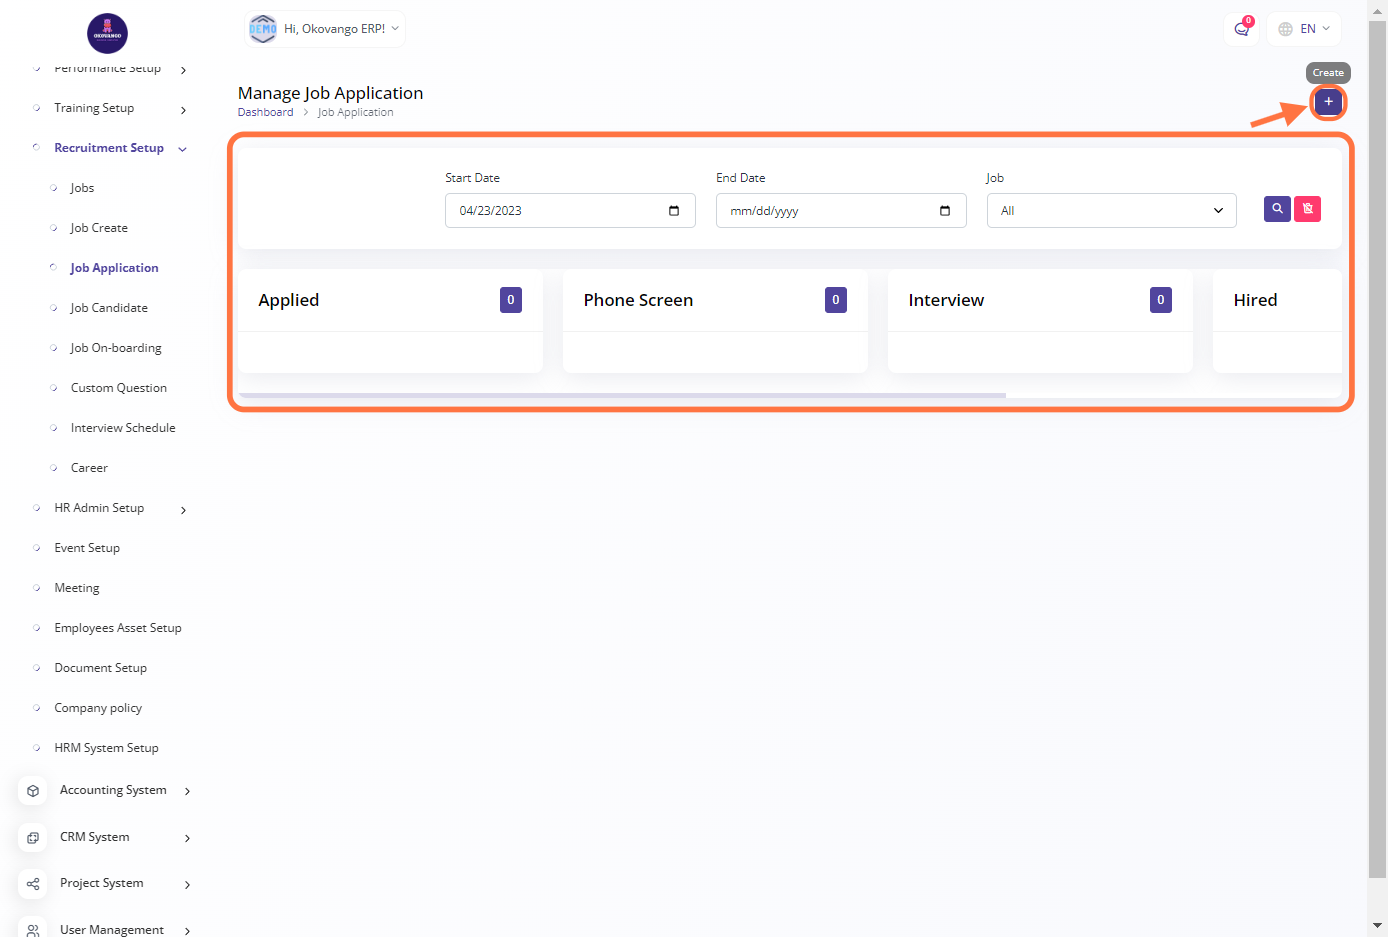
STEP 1: Click on "Create" Button
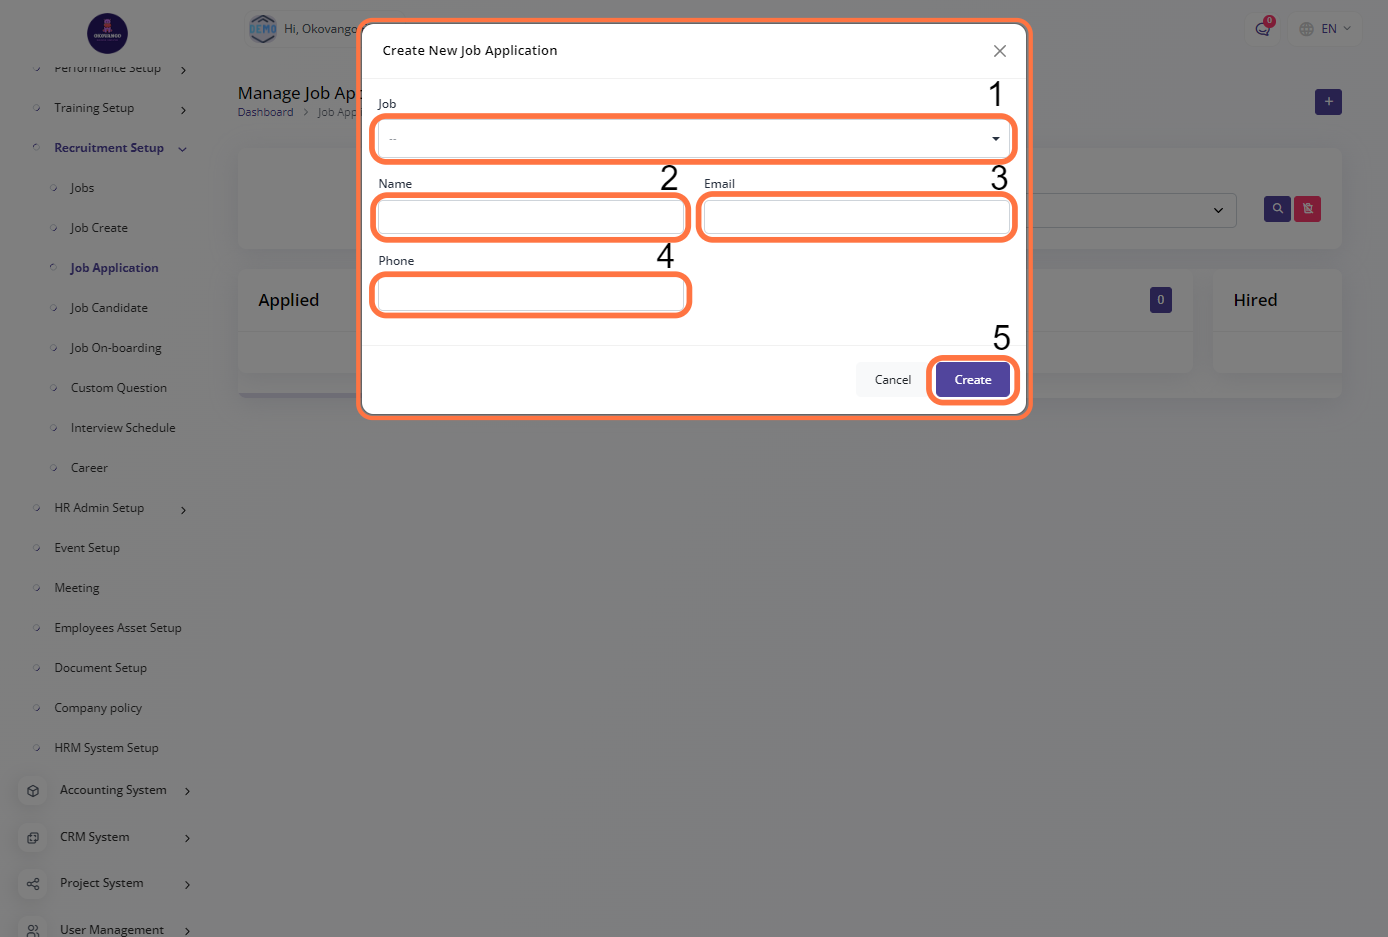
STEP 2: Create a New Job Application
After clicking the create button, you can proceed to set up the job application using the following steps:
- Select the desired job position from the available options.
- Enter the applicant's name.
- Provide the applicant's email address.
- Enter the applicant's phone number.
- Finally, click the create button to create the job application.
These steps allow you to capture and manage job applications efficiently, ensuring that all necessary information is collected for the application process.
Job Candidate
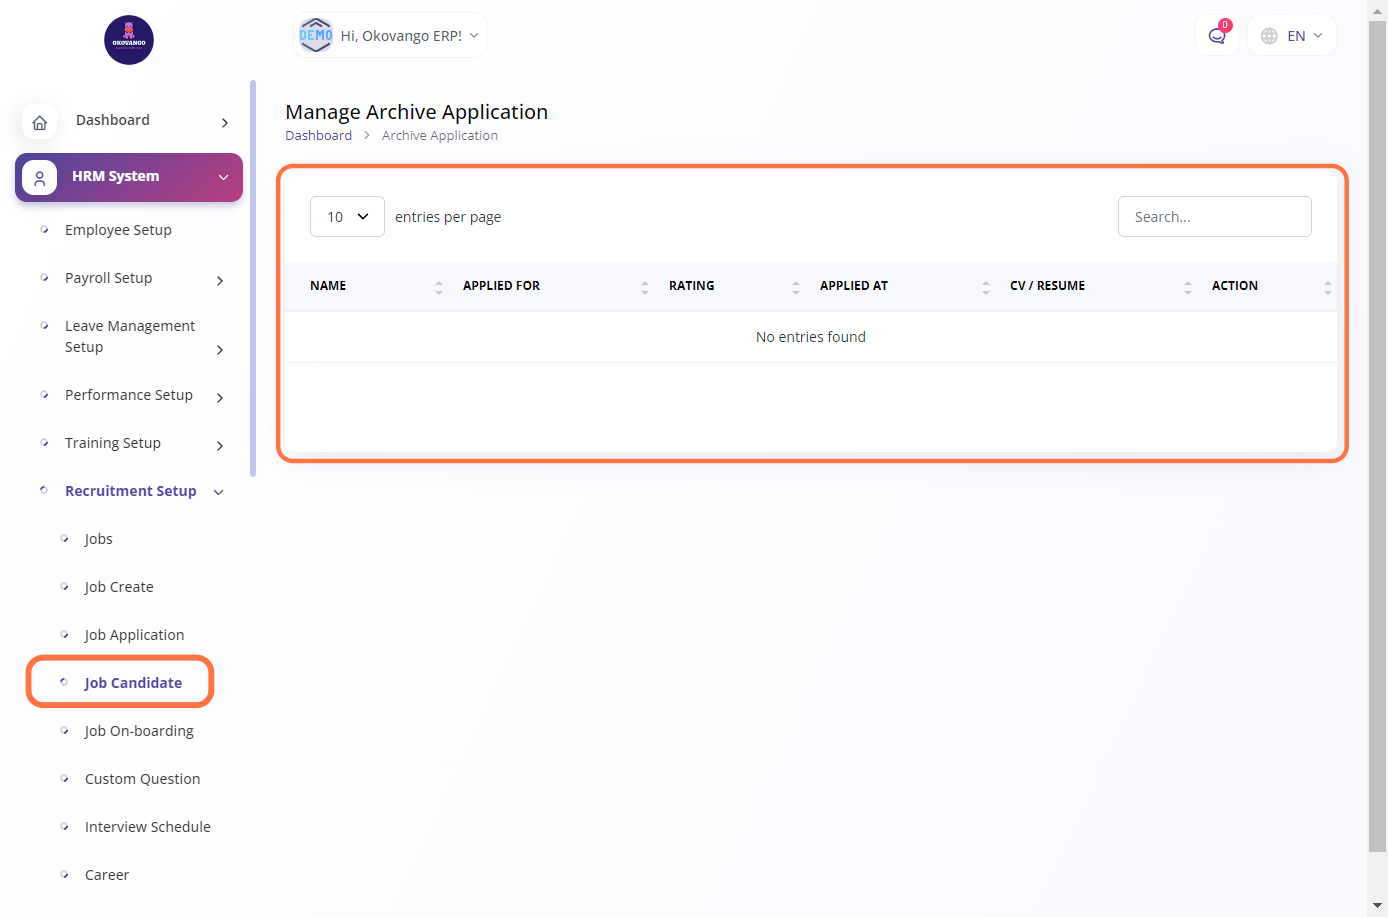
In the job candidate management section, you can effectively manage and track the candidates applying for job positions within your organization. This feature enables you to store and organize candidate information, facilitating the recruitment and selection process. You can create candidate profiles, enter their details such as name, contact information, qualifications, and work experience. Additionally, you can track the status of each candidate, schedule interviews, and make relevant notes or comments. This helps streamline the hiring process and ensures efficient management of job candidates from initial application to final selection.
Job On-Boarding
In the job onboarding management section, you can effectively manage and streamline the onboarding process for new employees joining your organization. This feature allows you to guide and support new hires through the necessary steps and paperwork required for their smooth integration into the company. You can create onboarding checklists or workflows that outline the tasks and activities to be completed, such as filling out forms, attending orientation sessions, and completing training modules. Additionally, you can track the progress of each employee's onboarding process, ensure compliance with company policies, and provide necessary resources and information. This helps ensure a structured and organized onboarding experience, fostering employee engagement and productivity from day one.
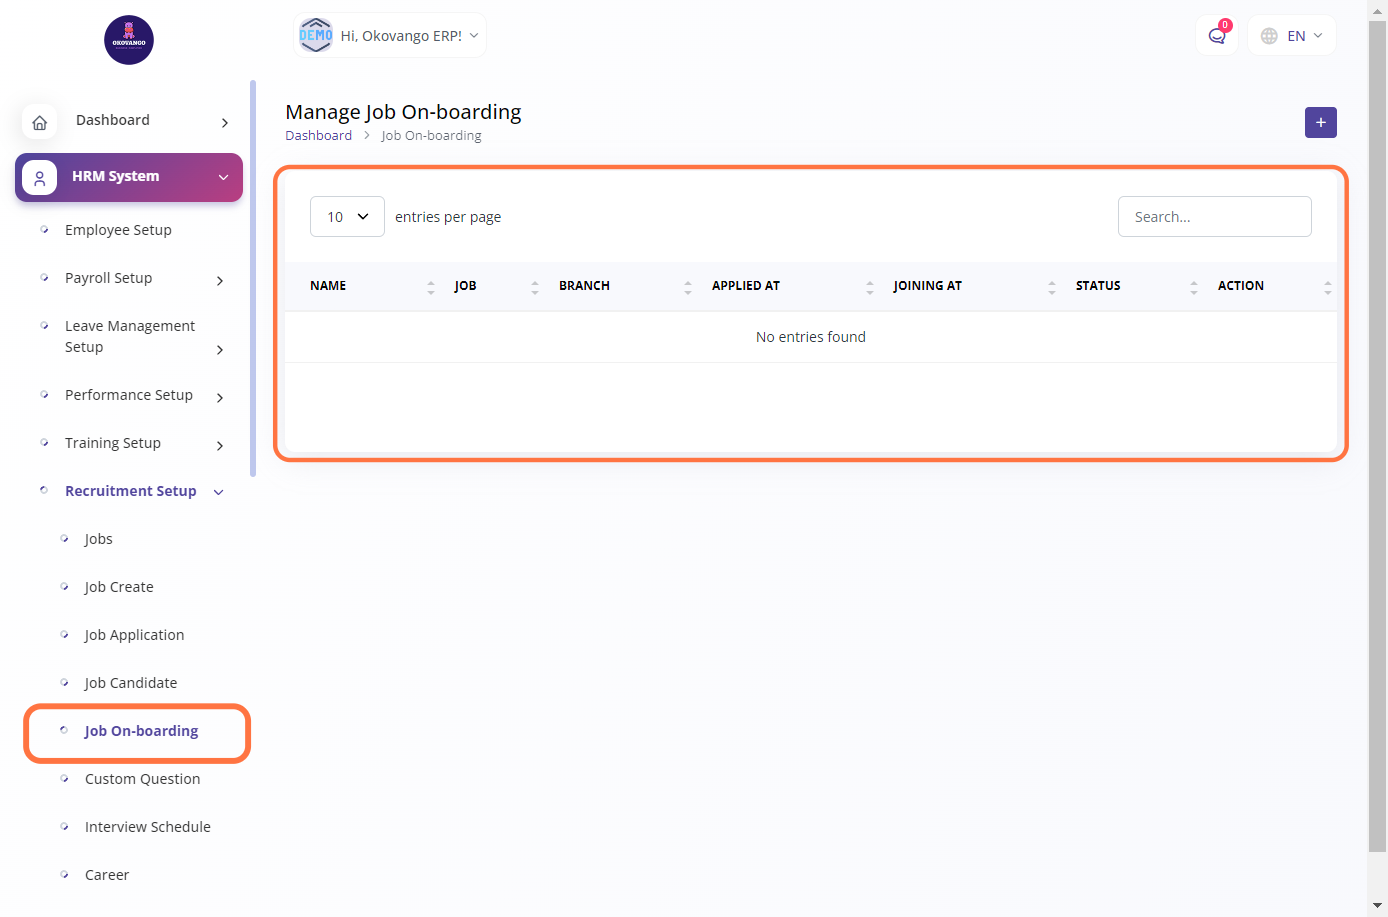
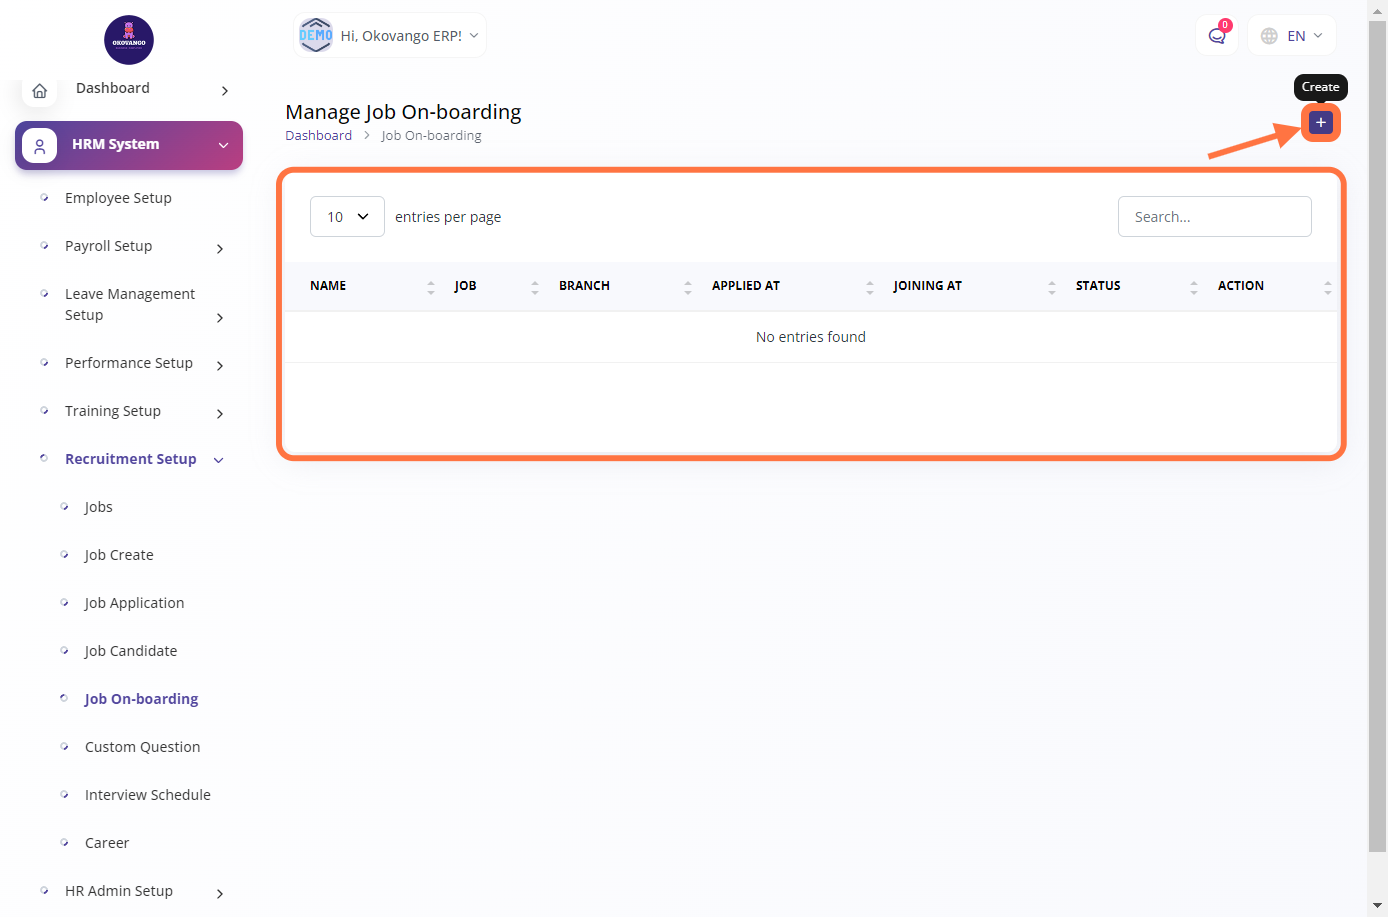
STEP 1: Click on "Create" Button
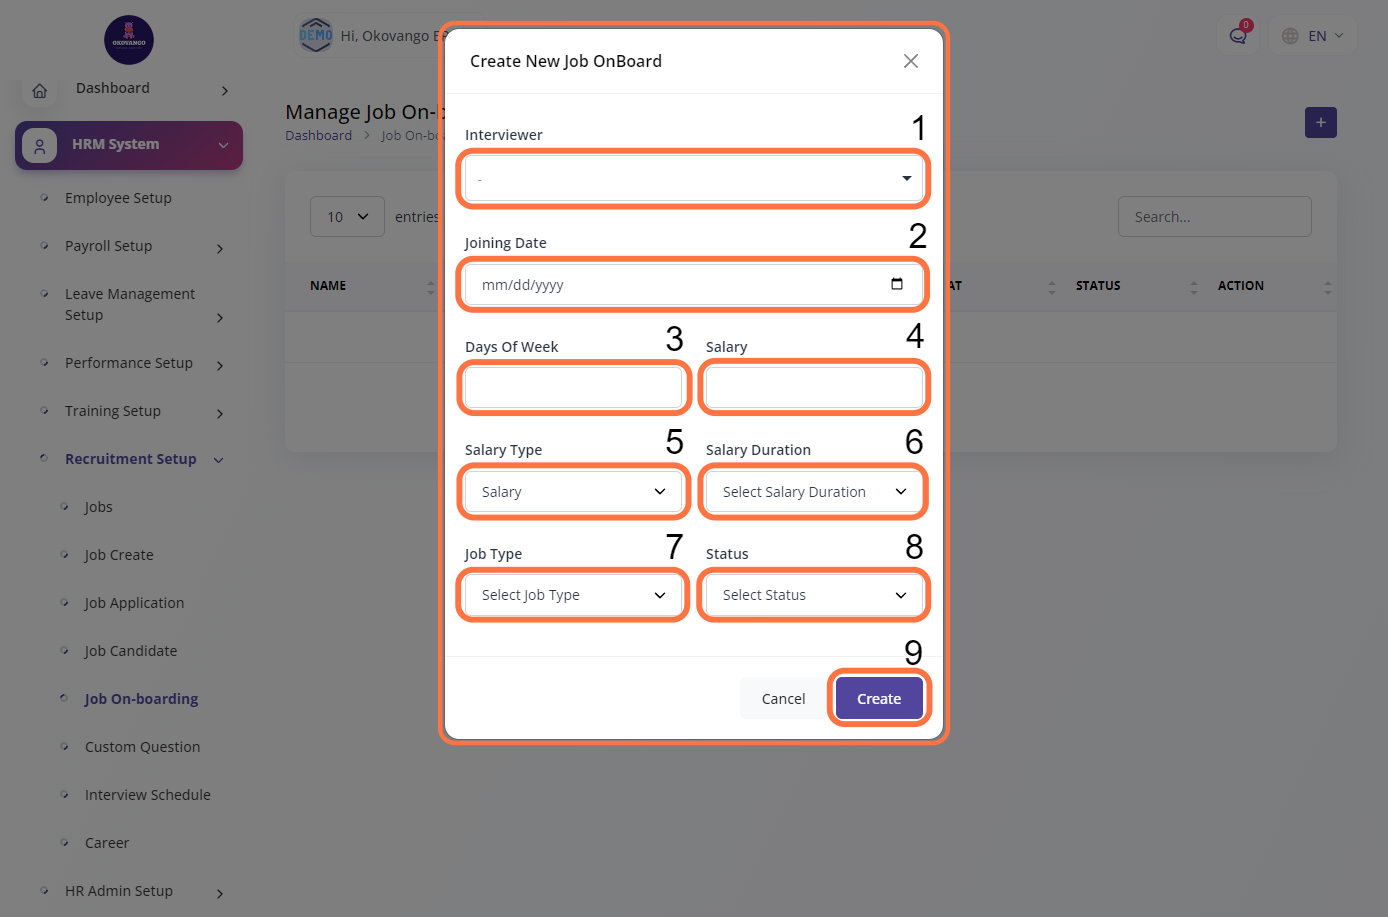
STEP 2: Create New Job On-Boarding
Once you click the create button, you can proceed to set up the job onboarding using the following steps:
- Select the interviewer responsible for the onboarding process.
- Choose the joining date for the new employee.
- Specify the days of the week when the employee is expected to work.
- Enter the salary details, including the amount.
- Enter the salary type (e.g., salary, reimbursement).
- Enter the salary duration (e.g., monthly, weekly).
- Select the job type associated with the position.
- Set the status of the onboarding process (e.g., in progress, completed).
- Finally, click the create button to finalize the setup of the job onboarding.
These steps allow you to configure the necessary details for a smooth and organized onboarding experience for new employees in your organization.
Custom Question
In the custom question setup section, you have the ability to create and customize interview or application questions according to your organization's specific requirements. This feature allows you to tailor the questionnaire to gather the necessary information from job candidates. You can create questions related to skills, qualifications, experience, or any other criteria relevant to the job position. By setting up custom questions, you can effectively evaluate candidates and make informed decisions during the recruitment process.
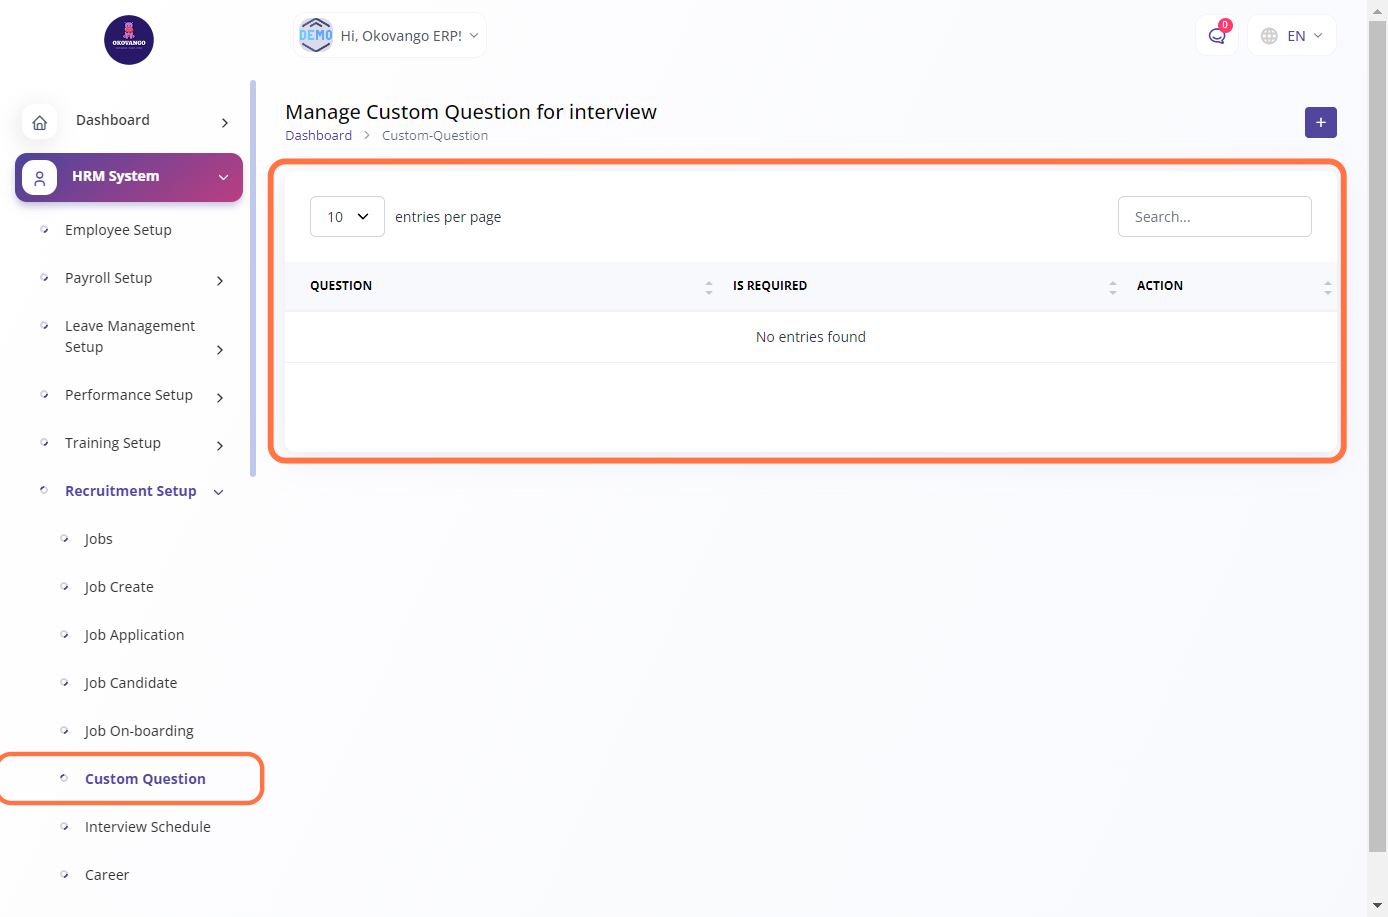
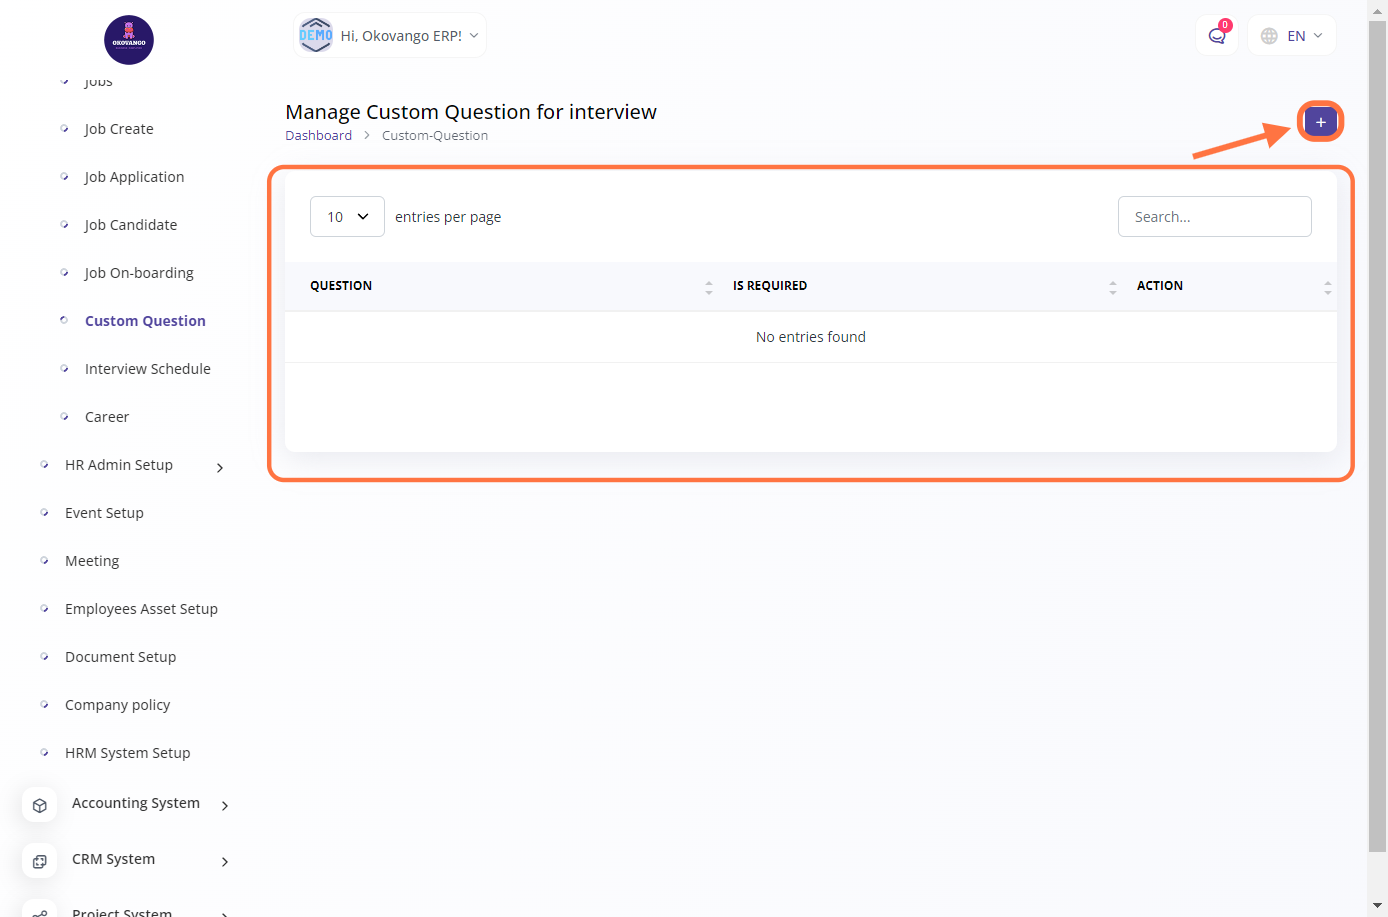
STEP 1: Click on "Create" Button
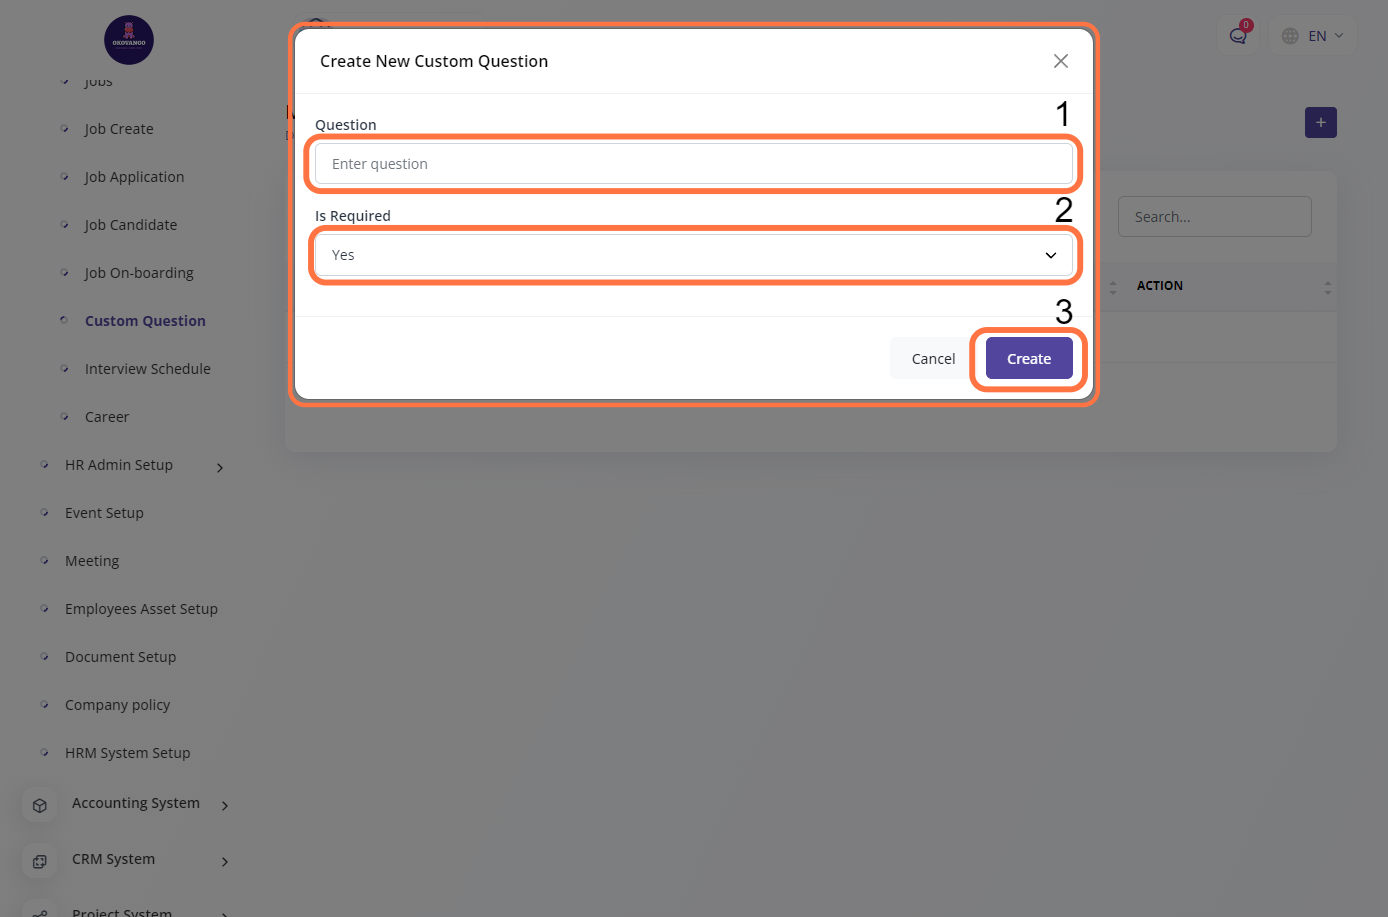
STEP 2: Create New Custom questions
After clicking the create button, you can proceed to set up a custom question by following these steps:
- Enter the question you want to ask.
- Select whether the question is required or optional (yes or no).
- Click the create button to finalize the setup of the custom question.
This allows you to create and customize specific questions for interviews or applications, and determine if they are mandatory or not.
Interview Schedule
In the job interview schedule setup section, you can efficiently manage and schedule job interviews for candidates. This feature allows you to create and schedule interview slots based on availability and convenience. You can select the date, time, and location for each interview, as well as specify the interviewers involved. Additionally, you can send interview invitations to candidates, track their responses, and make necessary adjustments to the schedule if needed. This helps streamline the interview process and ensures effective coordination between interviewers and candidates.
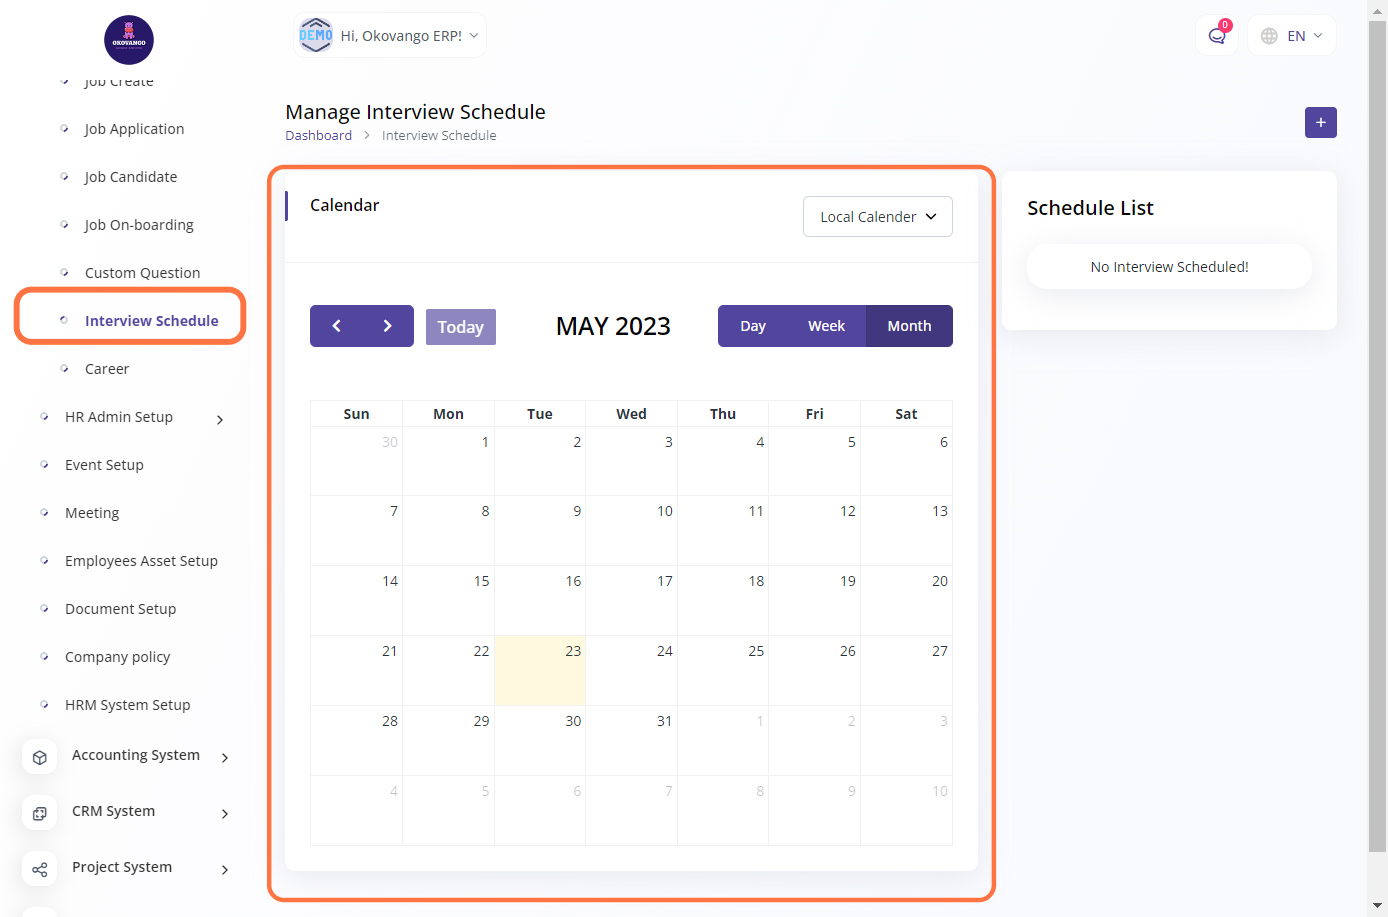
STEP 1: Click on "Create" Button
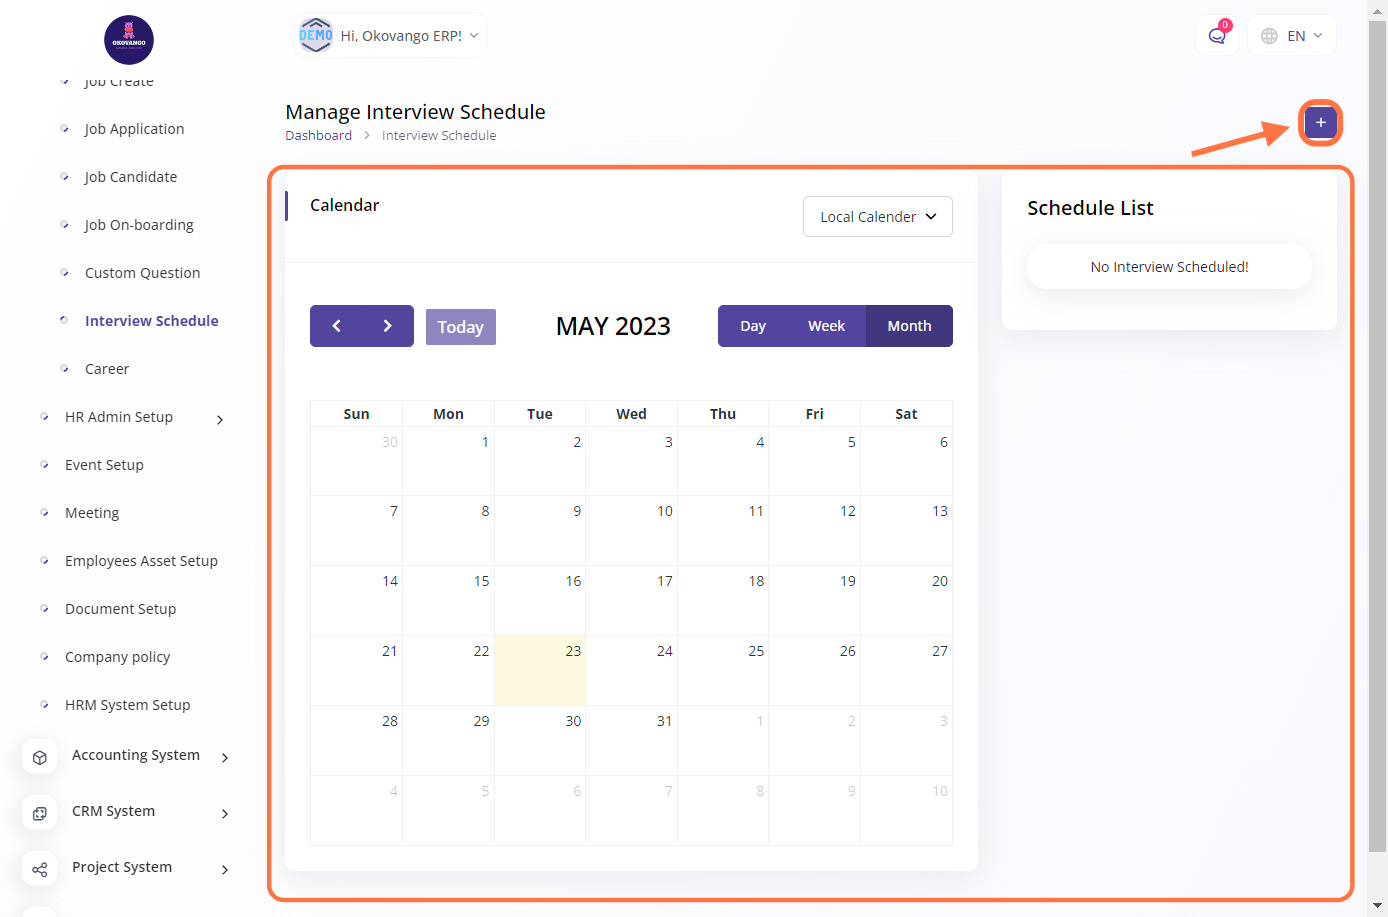
STEP 2: Create New Interview Schedule
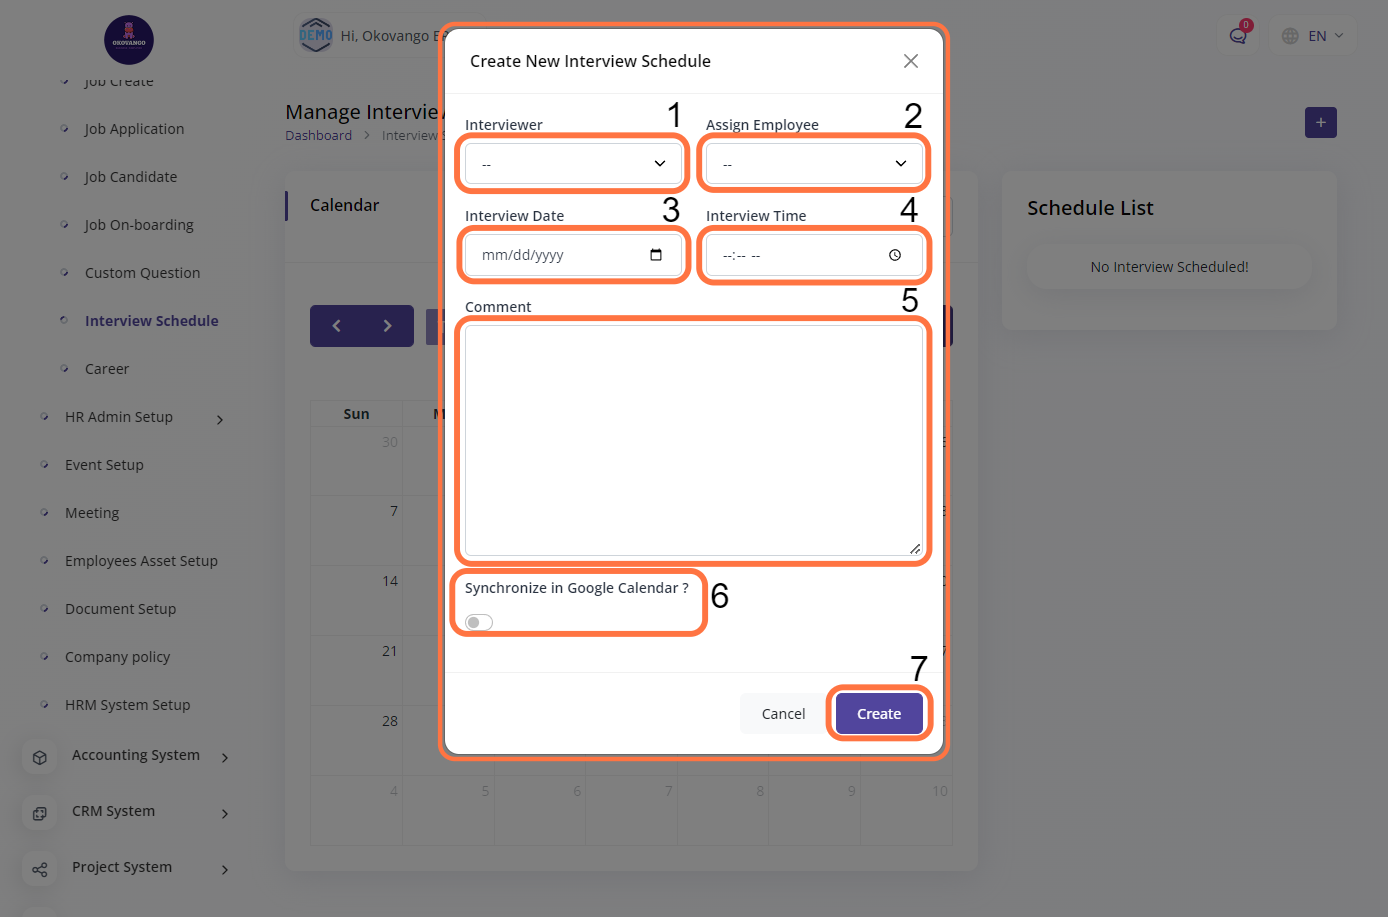
After clicking the create button, you can proceed to set up an interview schedule by following these steps:
- Select the interviewer by choosing the assigned employee for the interview.
- Specify the interview date and time.
- Add any relevant comments or notes.
- Optionally enable or disable synchronization with Google Calendar.
- Finally, click the appropriate button to save or create the interview schedule.
This process allows you to efficiently schedule and manage job interviews, assign interviewers, and maintain organized records of interview details.
