Accounting Setup
By setting up taxes, categories, units, and custom fields in the accounting system, you can ensure accurate and detailed financial management, streamlined inventory tracking, and customization to meet your specific business requirements.

Taxes
You can define the different tax rates applicable to your products or services. You can specify the tax name, rate percentage, and any additional information required for accurate tax calculations. This ensures that your invoices and financial reports reflect the correct tax amounts.

Step 1: Click the "Create" Button

STEP 2: Create New Tax rate
After clicking the create button in the tax setup, you can proceed to set up a new tax rate using the following steps:
-
Enter the tax rate name: Provide a descriptive name for the tax rate, such as "Sales Tax" or "VAT."
-
Enter the tax rate percentage: Specify the percentage value of the tax rate. This represents the tax amount to be applied to the taxable items or services.
-
Click the create button: Once you have entered the tax rate name and percentage, click the create button to finalize the creation of the new tax rate.
By following these steps, you can effectively set up a new tax rate in the accounting system, which can then be applied to relevant transactions and calculations.

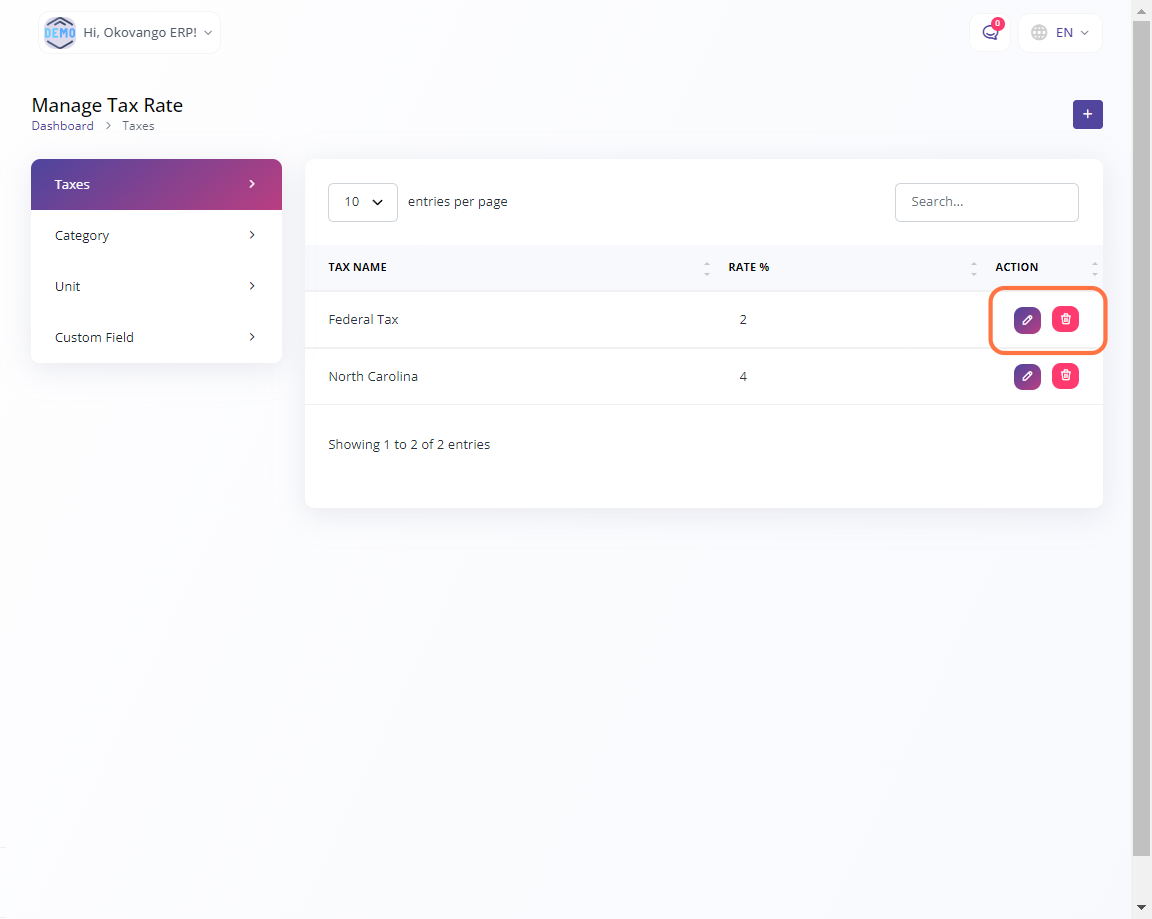
STEP 3: "Edit or Delete" Button
After setting up a tax rate in the accounting system, you have the option to edit the tax rate details if needed. This allows you to modify the tax rate name or percentage as required. Additionally, you can also delete the tax rate if it is no longer needed, removing it from the system.
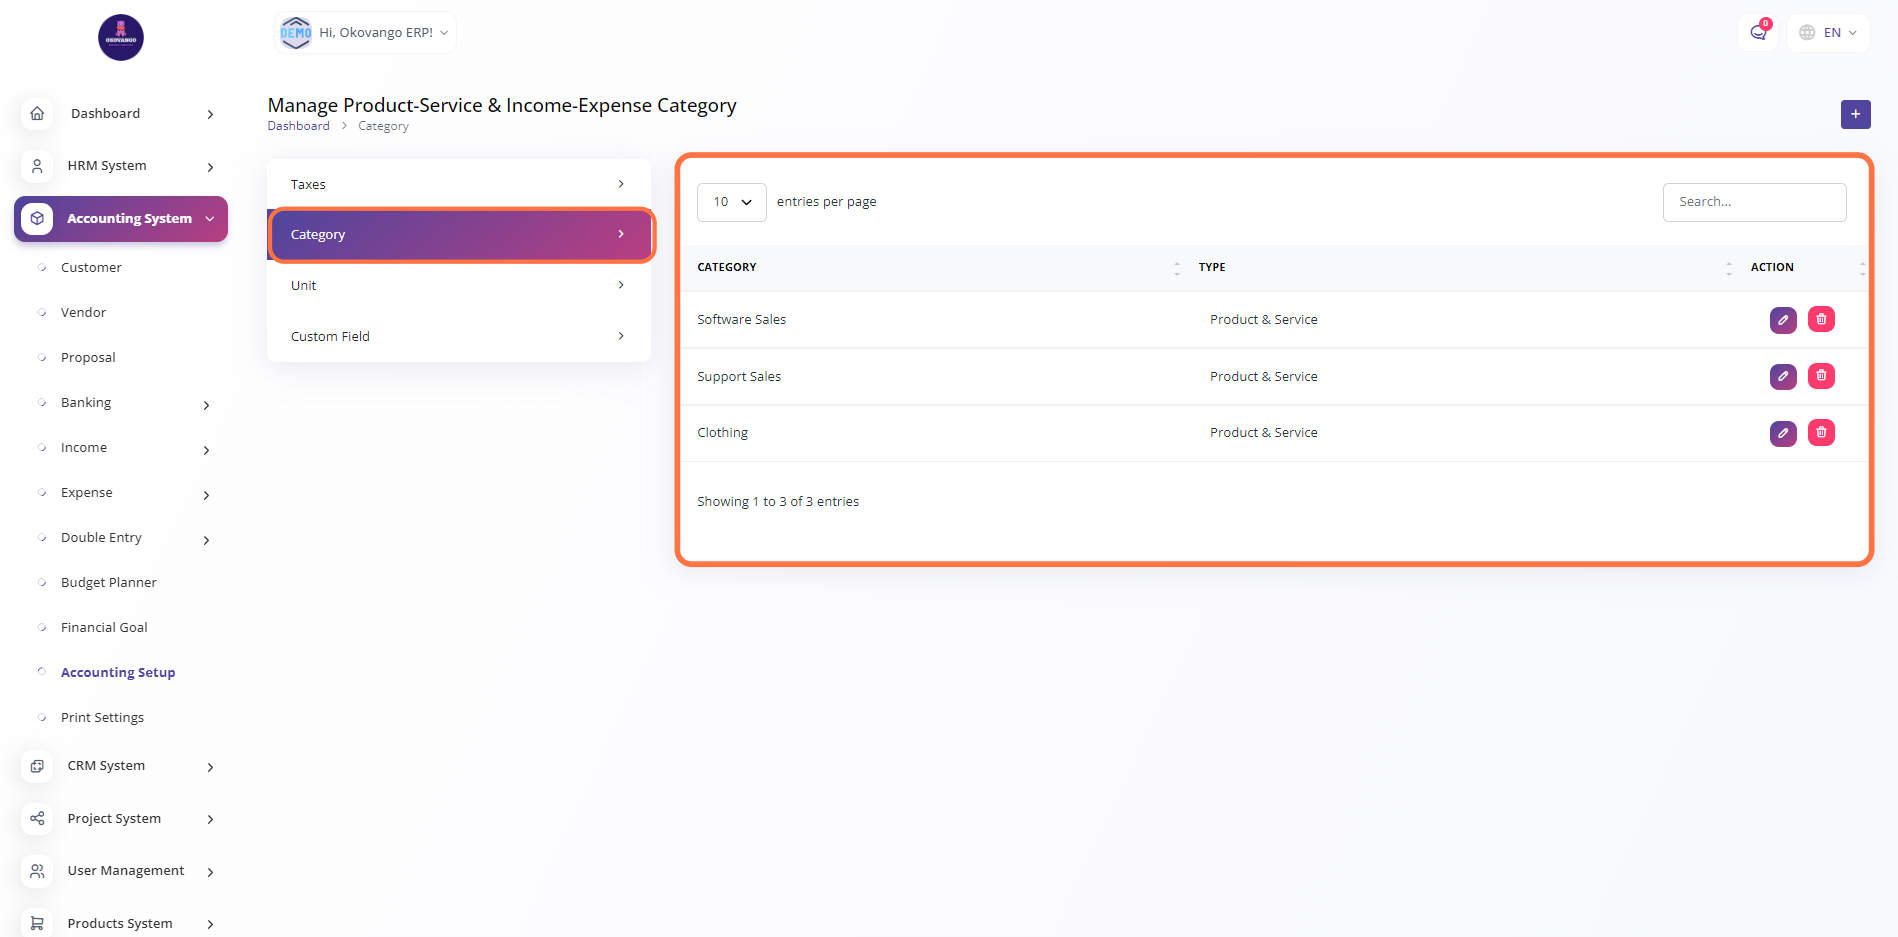
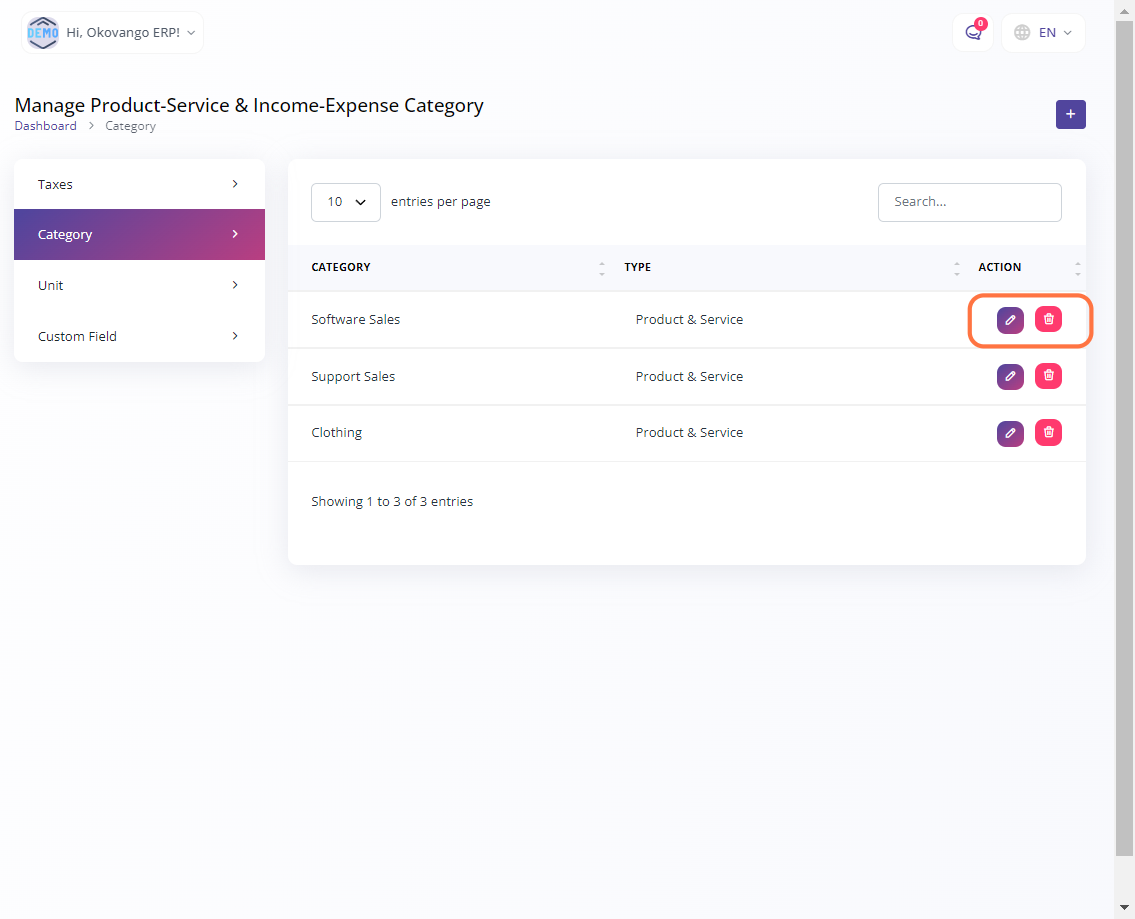
Category
Categories provide a way to organize and classify your financial transactions, products, and services. By setting up categories, you can easily track and analyze your business's income and expenses, making it simpler to generate reports and gain insights into your financial performance.
Step 1: Click the "Create" Button
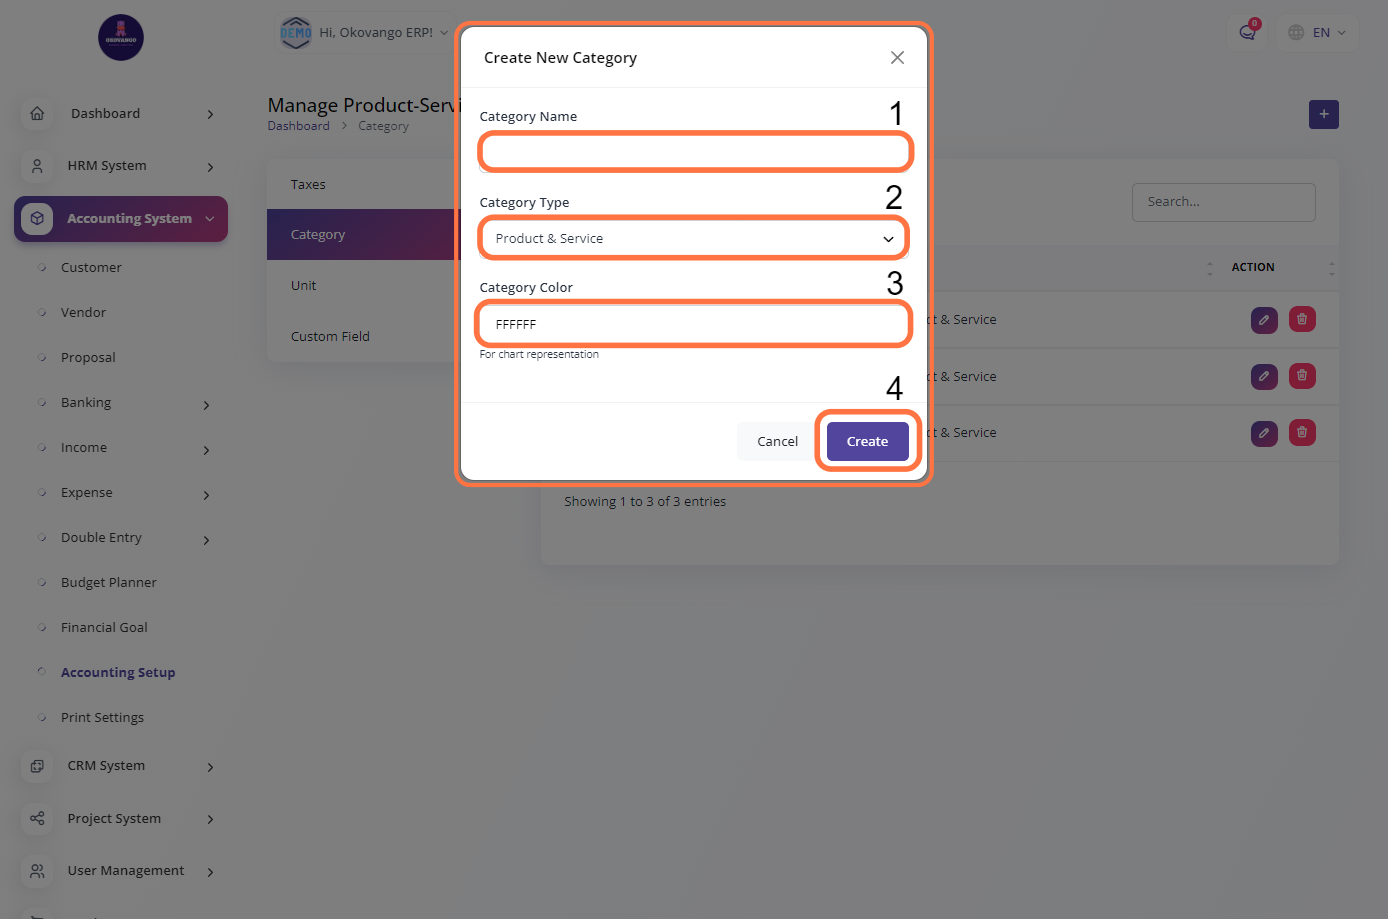
STEP 2: Create New Category
After clicking the create button, you can proceed to set up a category in the accounting system using the following steps:
-
Provide a descriptive name that reflects the type of transactions this category will be associated with. For example, "Advertising Expenses," "Rent," or "Office Supplies."
-
Choose the appropriate category type that best represents the nature of the transactions. Common category types include income, expense, asset, liability, and equity.
-
Assign a color to the category for easy visual identification. This can help you quickly differentiate between categories when viewing reports or transactions.
-
Once you have entered the necessary details, click the create button to finalize the creation of the category.
By setting up categories in the accounting system, you can effectively organize and track your financial transactions, making it easier to analyze your business's financial performance and comply with accounting standards.
STEP 3: "Edit or Delete" Button
You have the option to edit and delete categories in the accounting system. Editing allows you to modify the name, type, and color of a category, while deletion removes the category and its associated transactions. Managing categories provides flexibility in organizing and maintaining accurate financial records.
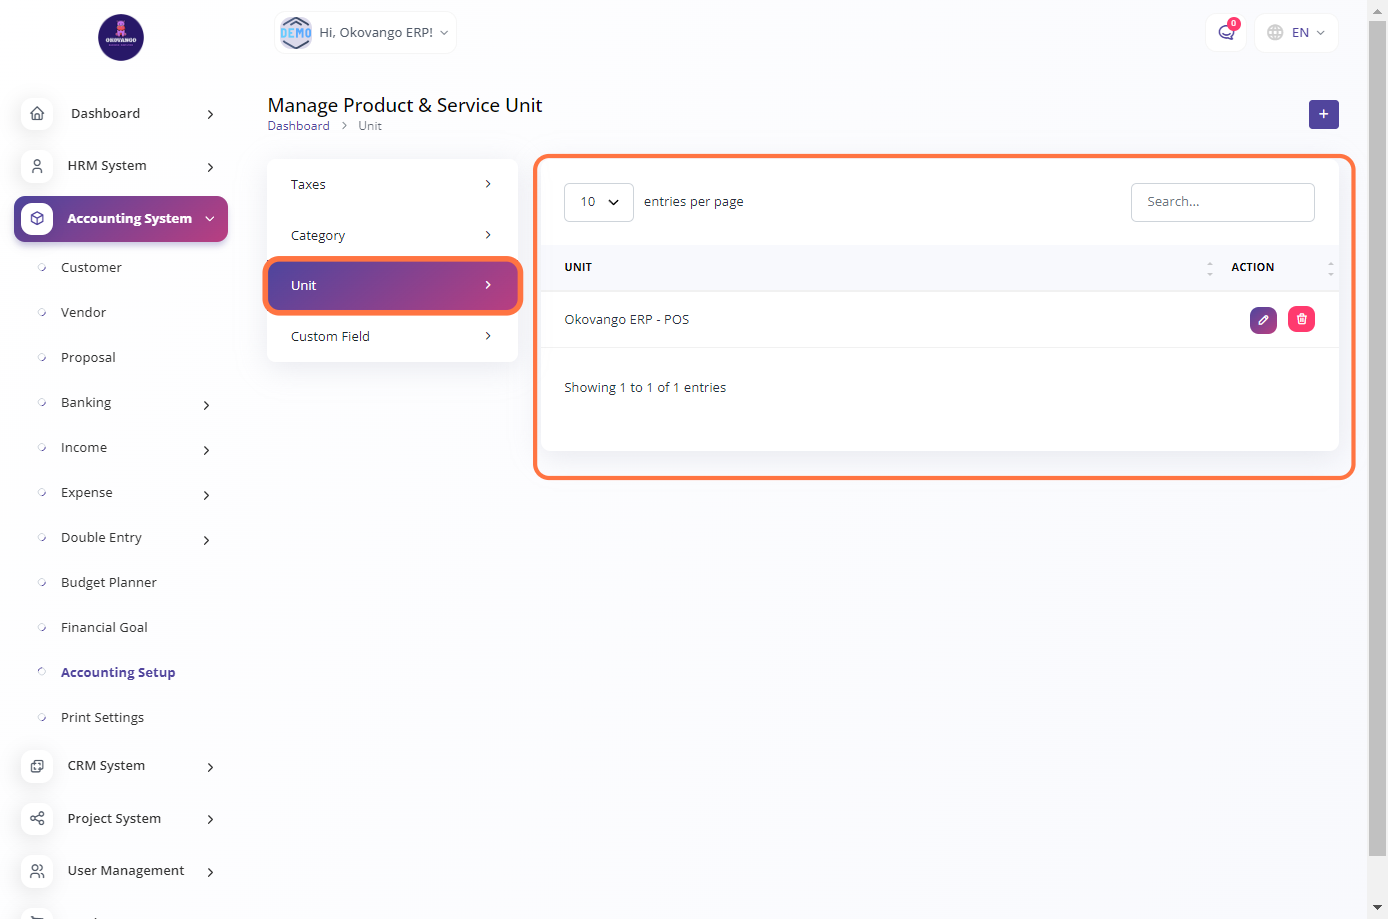
Unit
you can create and manage units of quantities for your products or services. This allows you to define and track quantities in a standardized manner. You can set up units by providing a unit name and an optional description. Additionally, you have the flexibility to edit or delete existing units as needed to align with your business requirements.
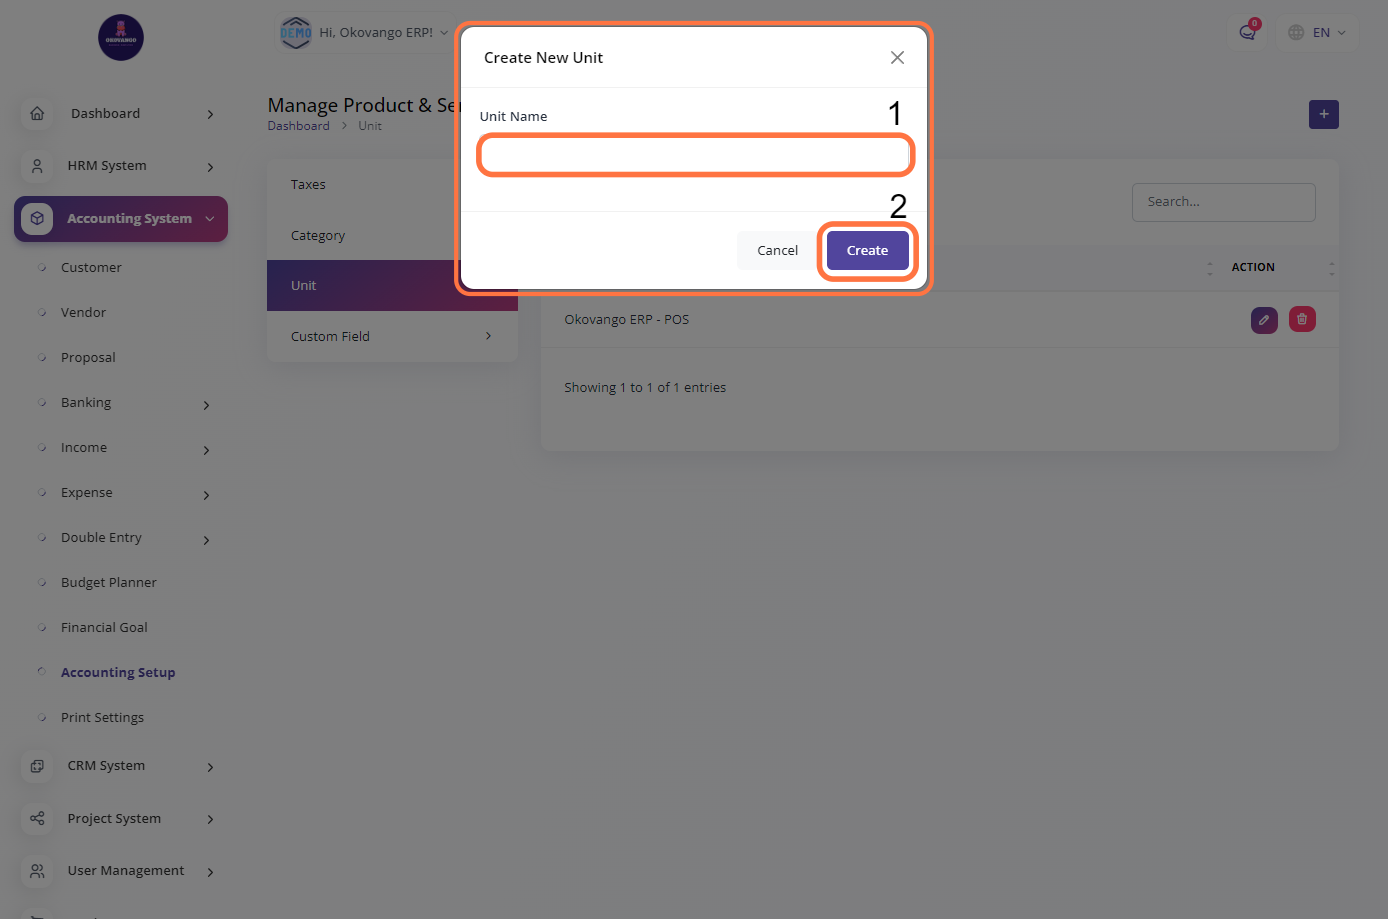
Step 1: Click the "Create" Button
STEP 2: Create New Unit
To set up a unit name in the accounting system, follow these steps:
1. Enter the name of the unit.
2. Click on the "Create" button to finalize the setup.
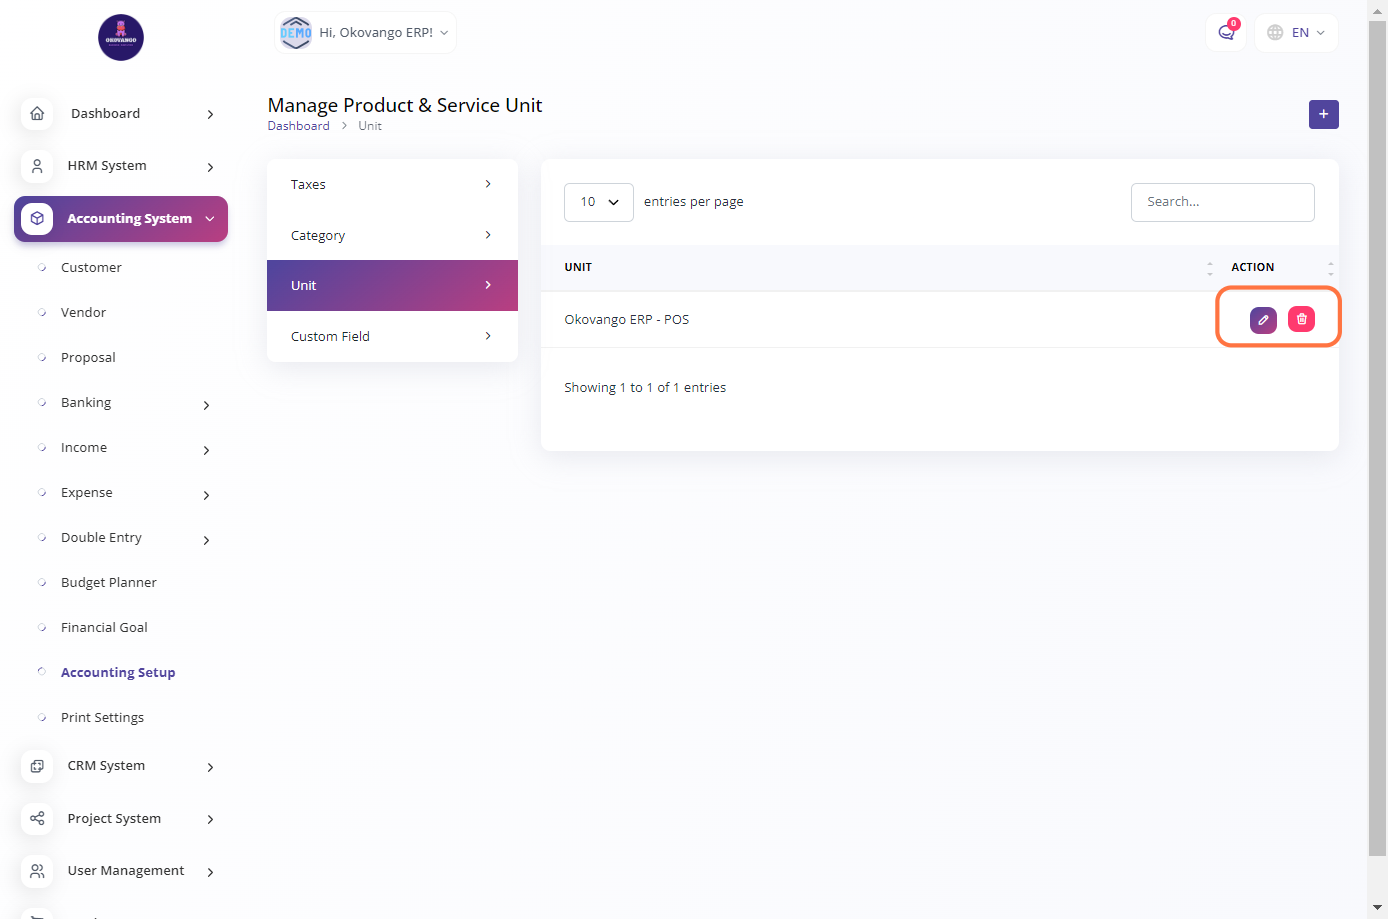
STEP 3: "Edit or Delete" Button
You can easily edit or delete a custom unit that you have created. This gives you the flexibility to modify or remove units as needed to accurately represent your business operations. Whether you need to update the unit name, change its conversion rate, or remove it altogether, you can easily perform these actions in the unit settings.
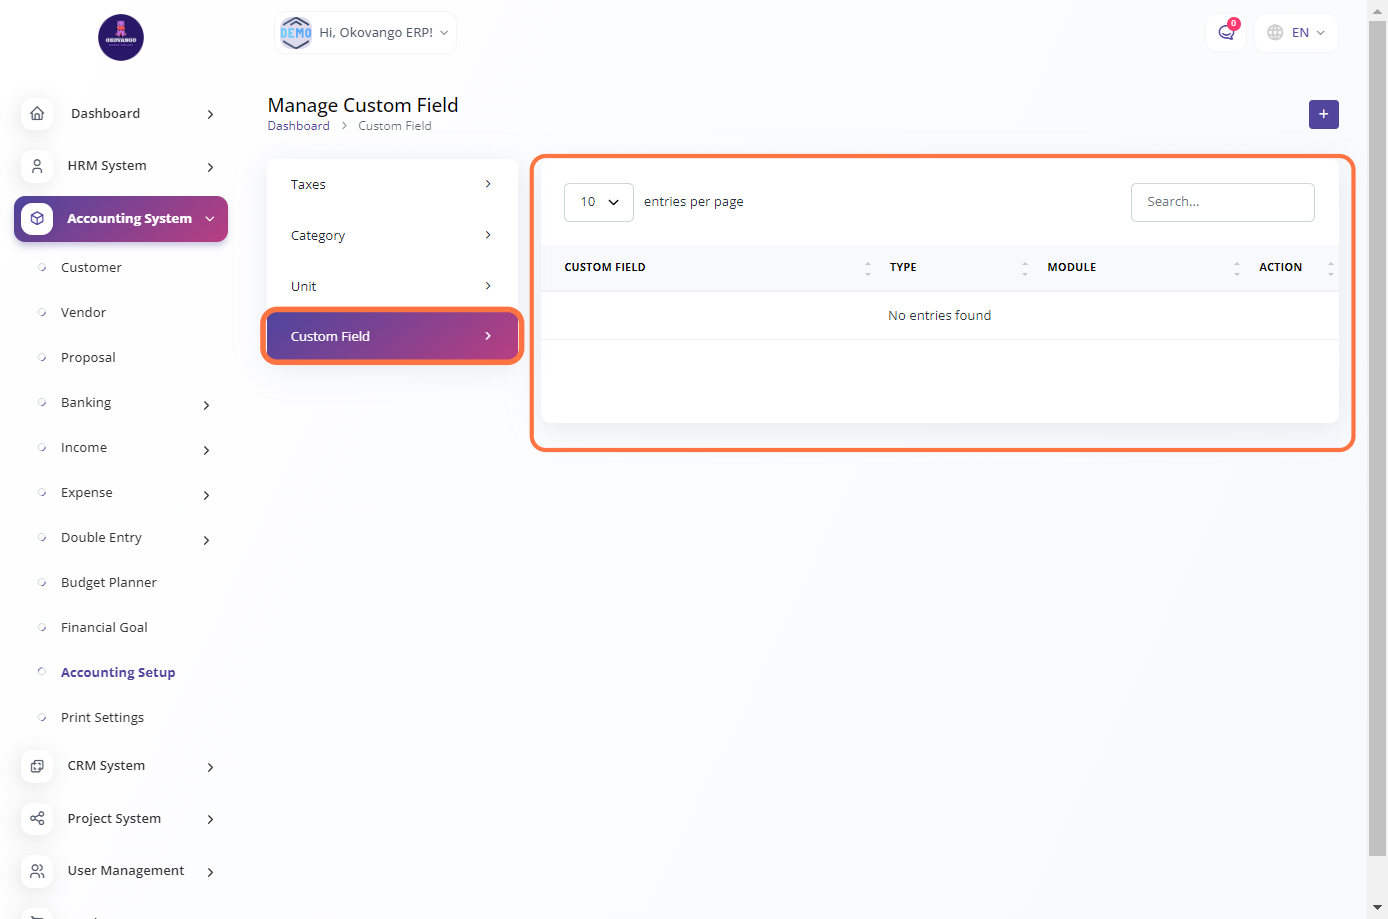
Custom Field
In the accounting system, you have the option to set up custom fields. These fields allow you to add specific information that is relevant to your business needs. You can create custom fields based on your requirements, such as additional details for invoices or bills. These custom fields provide flexibility in capturing and organizing data within the accounting system.
Step 1: Click the "Create" Button
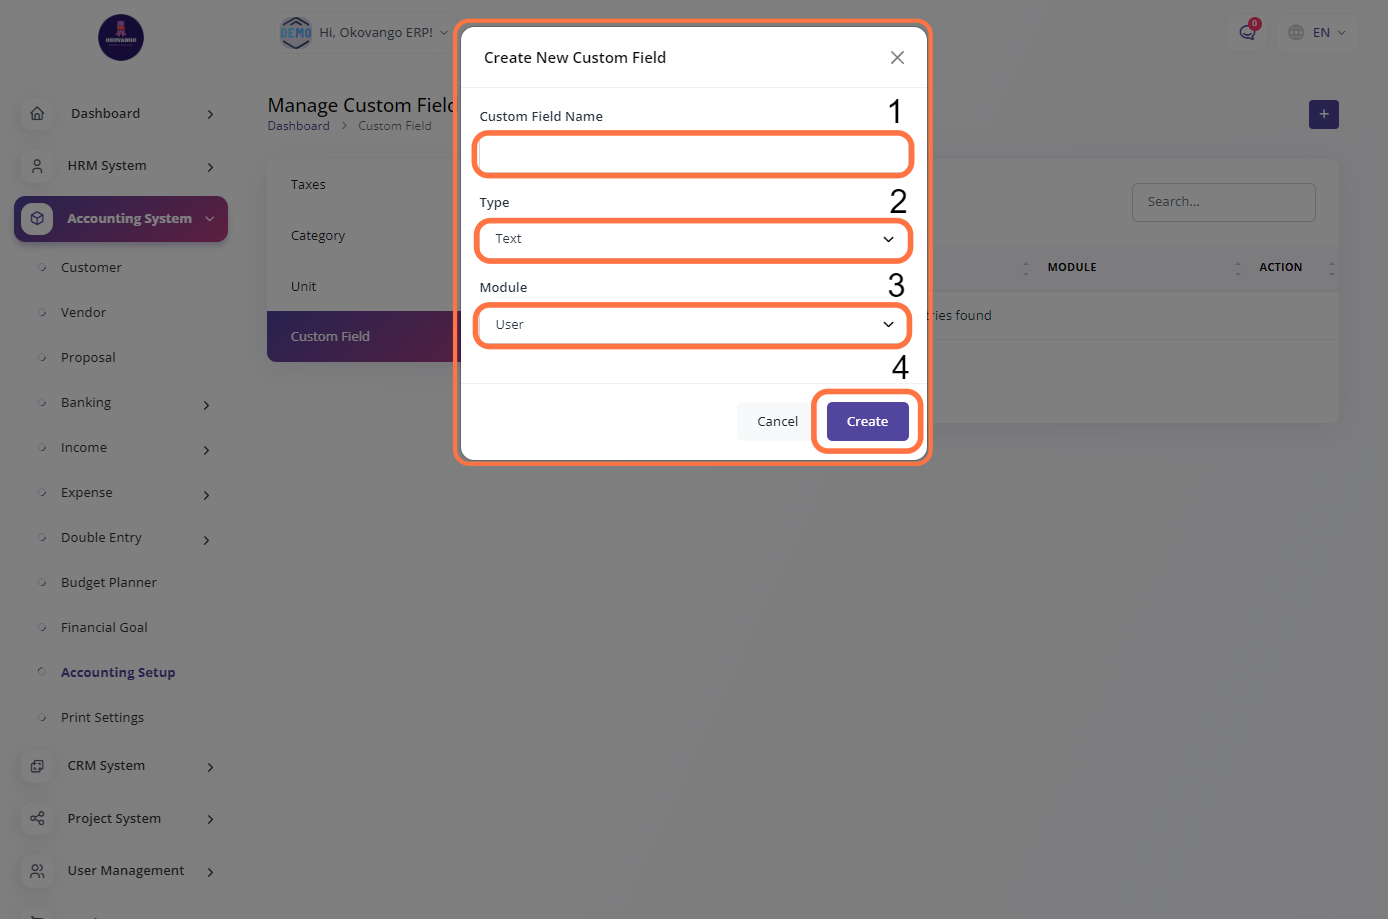
STEP 2: Create New Custom Field
Once you click the create button, you can proceed to set up a custom field in the accounting system using the following steps:
-
Enter a descriptive name for the custom field that reflects the type of information you want to capture. For example, you can use "Client Type," "Payment Method," or "Project Code."
-
Choose the appropriate field type based on the kind of data you want to store. Common field types include text, number, date, Text area and more.
-
Determine the module or area of the accounting system where the custom field will be applicable. This can be invoices, bills, journal entries, contacts, or any other relevant module.
-
Click create: Once you have provided the necessary information, click the create button to finalize the setup of the custom field.
Setting up custom fields allows you to tailor the accounting system to your specific business needs. It enables you to capture additional information beyond the standard fields provided, giving you more flexibility and customization options when recording and organizing your financial data.