Setting up Form Builder
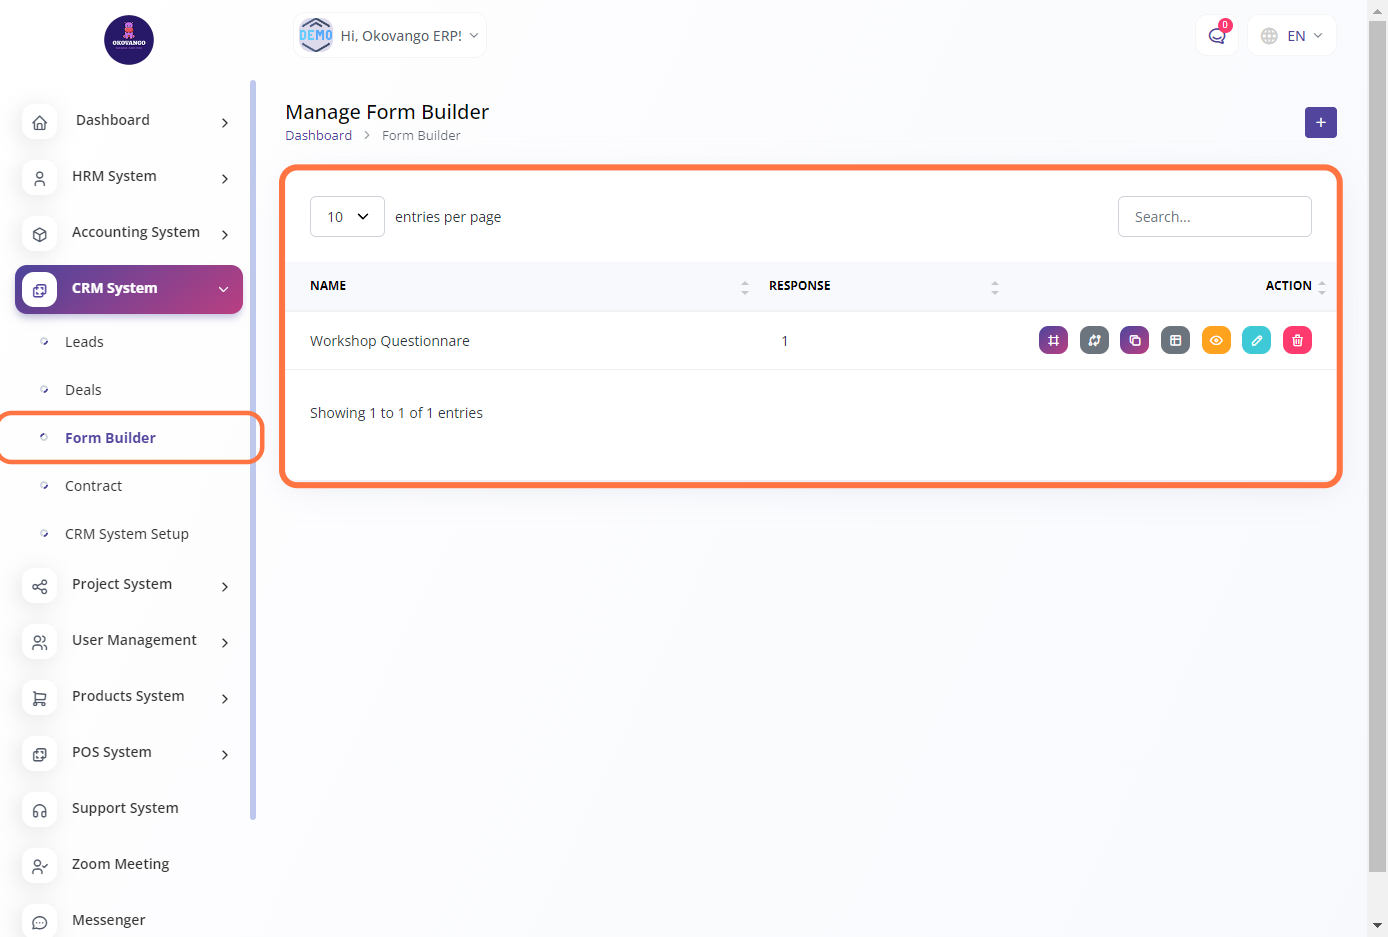
In the CRM form builder section, you can create and customize forms that are used for capturing customer data and interactions within your customer relationship management (CRM) system. This feature provides a user-friendly interface where you can design and configure forms according to your specific requirements. You can add various form fields such as text fields, dropdown menus, checkboxes, and more to collect the necessary information from your customers. By creating custom forms, you can streamline data collection, ensure consistency, and tailor the form fields to align with your CRM processes and data needs.
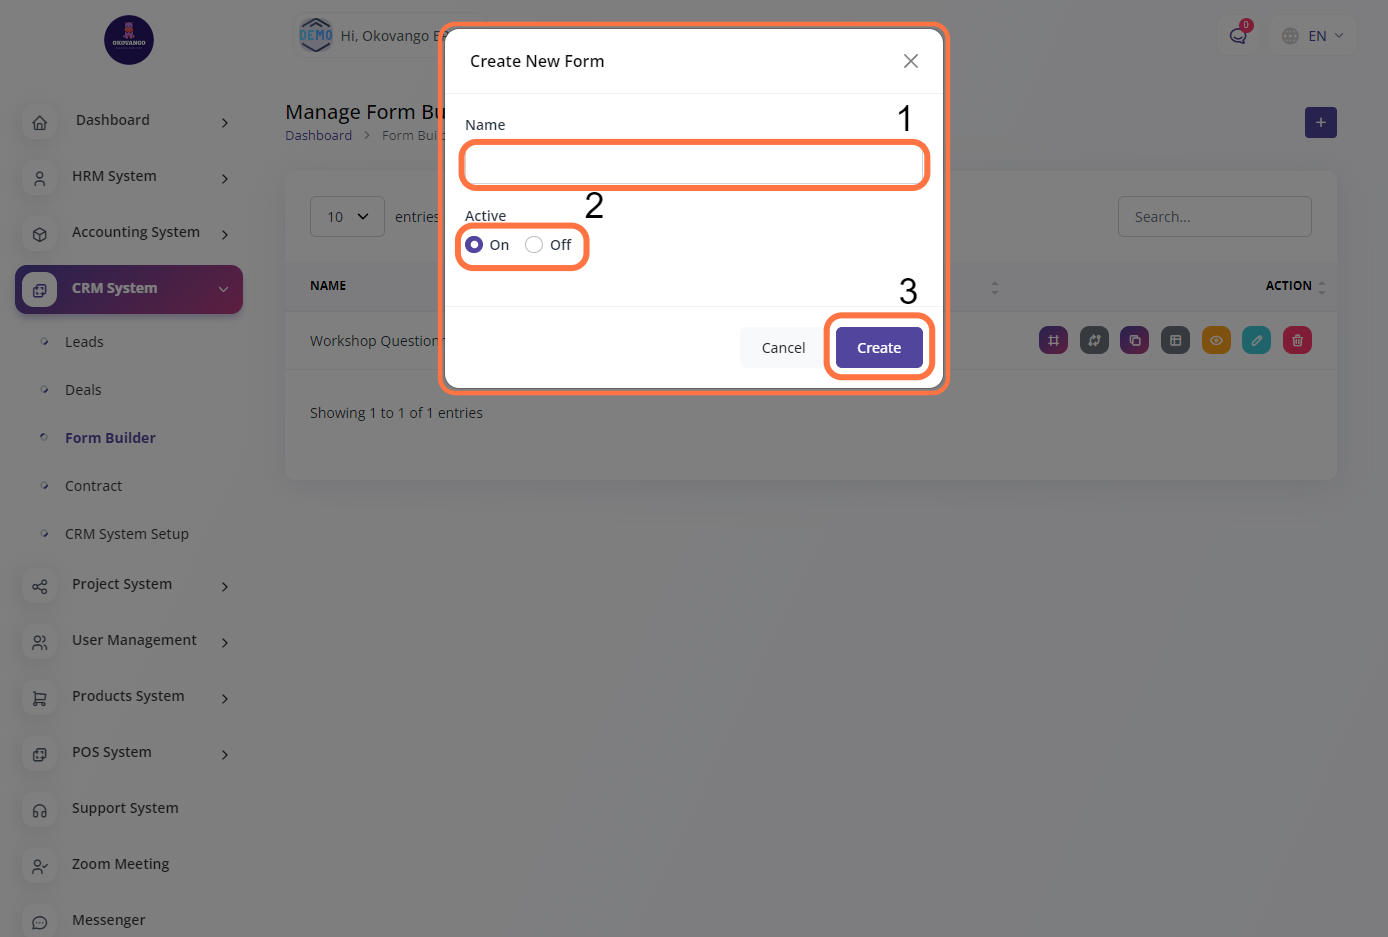
STEP 1: Click on "Create" Button

STEP 2: Create New form
Once you click the create button, you can proceed to set up a form by following these steps:
- Enter a name for the form.
- Select whether the form should be active (yes or no).
- Click the create button to finalize the setup.
By providing a name for the form and specifying its active status, you can create a customized form that suits your specific needs. This allows you to collect relevant information and interact with customers effectively. The ability to configure and activate forms gives you flexibility in managing and utilizing them within your CRM system.
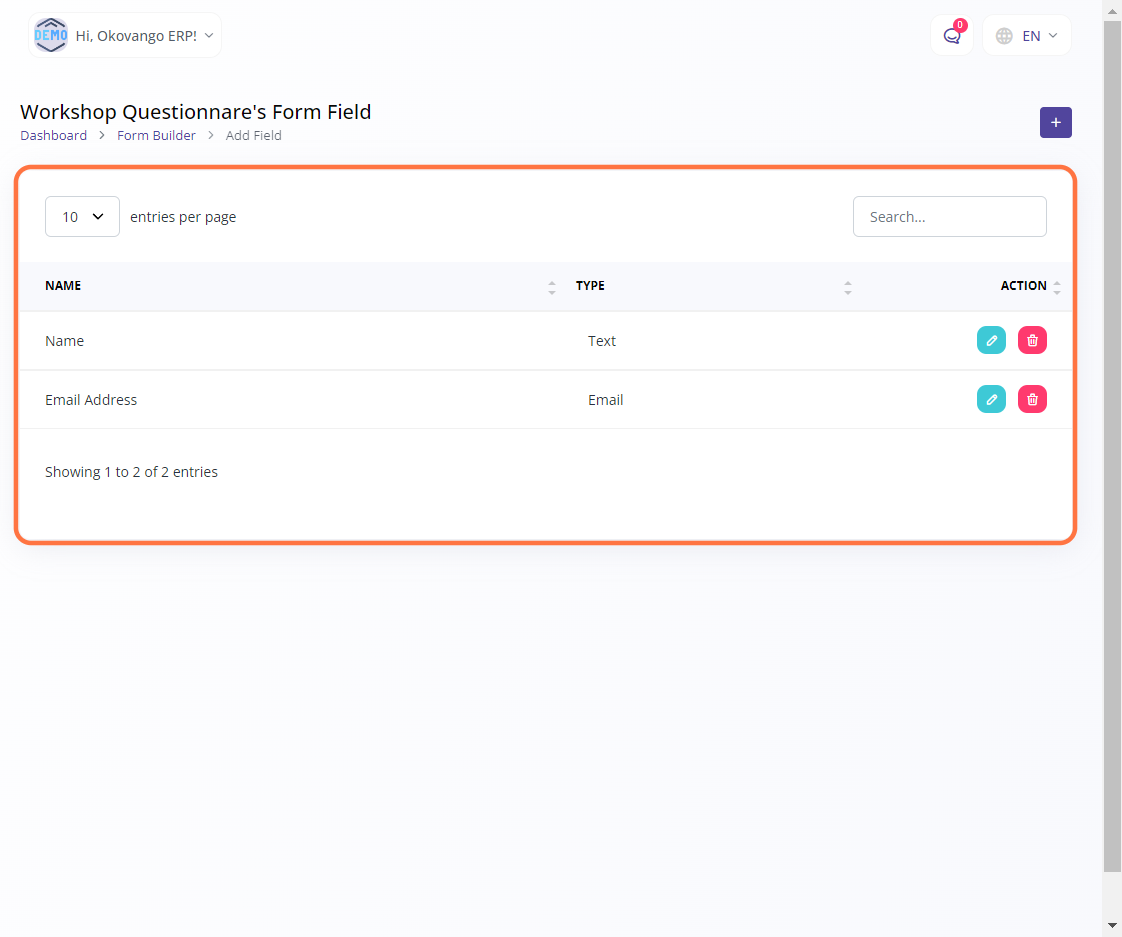
STEP 3: "Copy Iframe link, Convert into lead setting, Copy link, Form field, View Response, Edit or Delete" Button
In this action, you have several options available for the form:
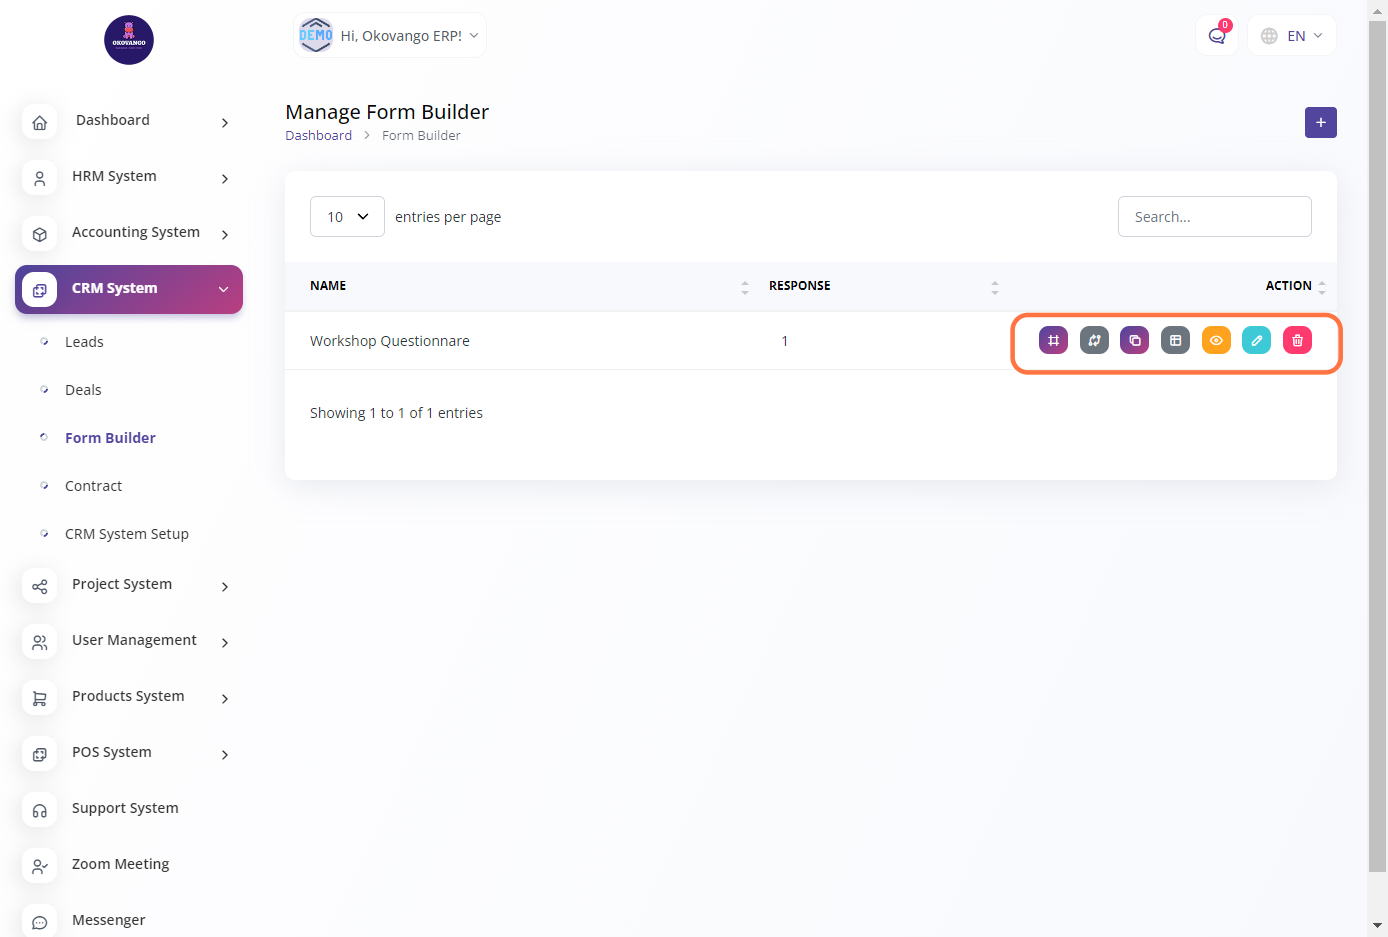
 Copy Iframe link
This allows you to copy the iframe link of the form, which can be embedded on websites or shared with others for easy access.
 Convert into lead setting
This setting enables you to specify how the form submissions should be handled and converted into leads within your CRM system.
 Copy link
This option lets you copy the direct link to the form, which can be shared with others through various communication channels.
 Form field
This option allows you to add, edit, or remove form fields, enabling you to customize the information you collect from form submissions.
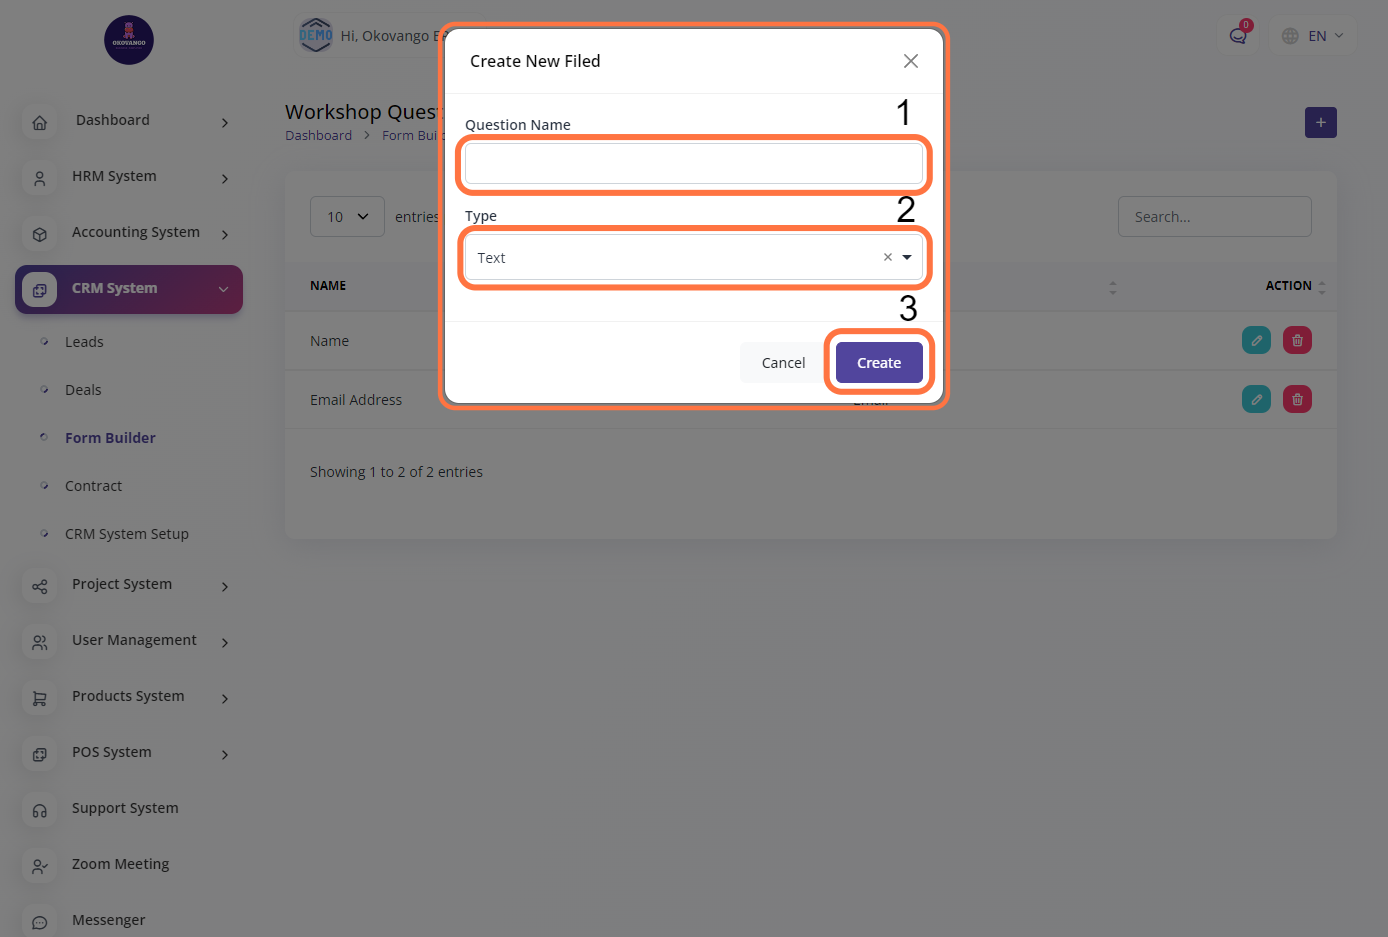
1. Click the "Create" Button

STEP 2: Create a New Field
Once you click the "New Field" button, you can proceed to set up the field using the following steps:
-
Enter the name or label for the field, which will serve as the question or prompt for the user.
-
Choose or select the appropriate type for the field
-
Click the "Create" button to finalize the setup of the new field.
By following these steps, you can add a new field to the form, customize its name and type based on your requirements, and ensure that it captures the necessary information from form respondents.
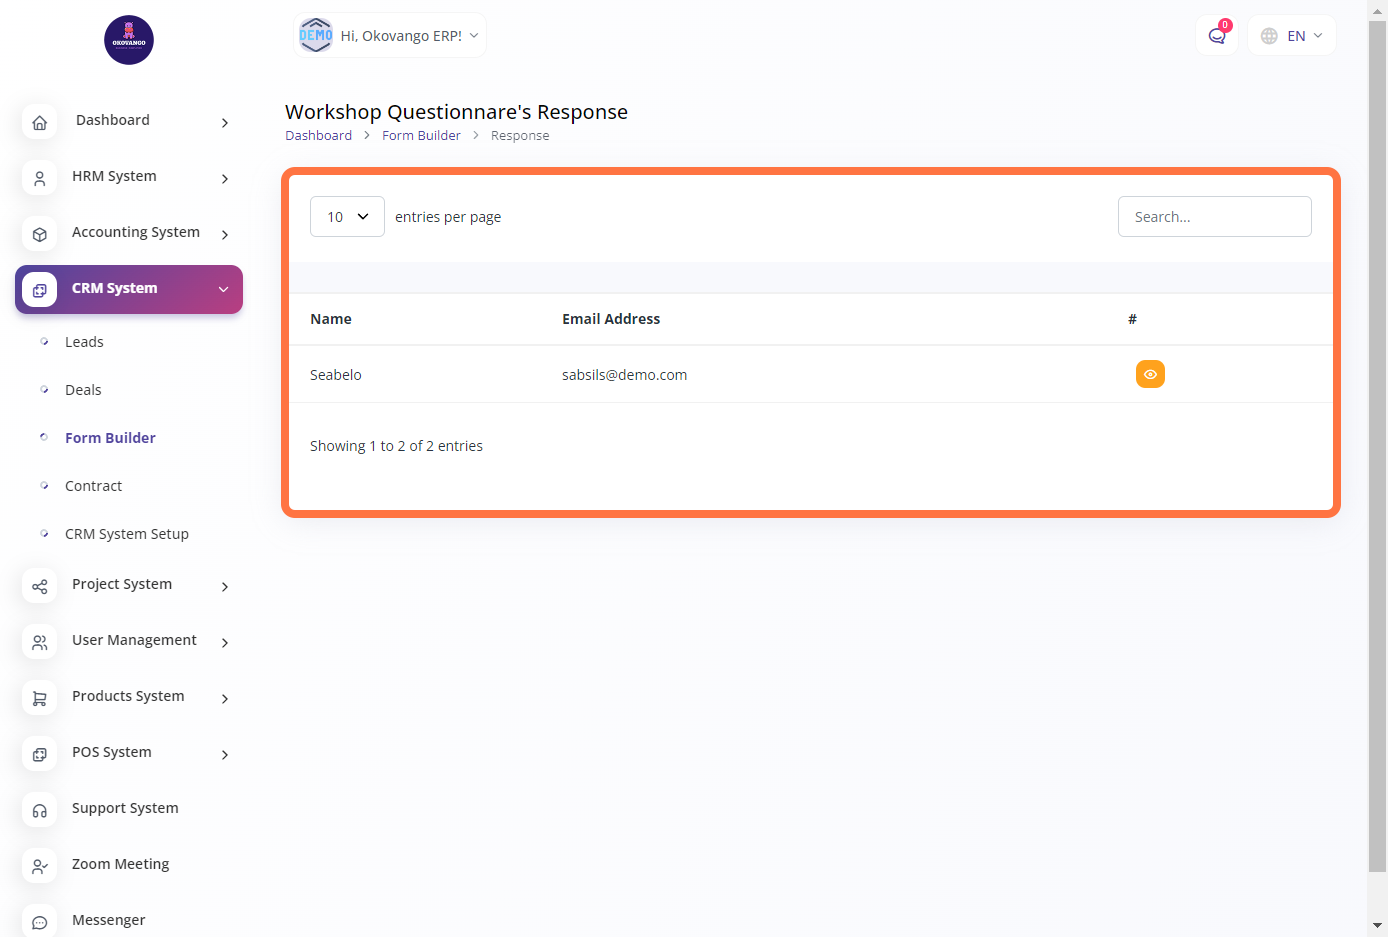
View Response
By selecting this option, you can view the responses and submissions received through the form, providing insights into customer interactions and data.